Thursday, April 28, 2011

Chicken, Two Ways


I've put aside my recipe binder this past week, and have been using this cook book I ordered through my Scholastic book order at school. I am not usually into cookbooks--many of the recipes aren't practical for my family or style of cooking, but this one is awesome. I've made three recipes out of it this week, and they were all delicious. So of course, I had to share a couple with you. It is Good Food Friday after all.

These both are chicken based--mostly a coincidence, but worked out nicely when buying groceries. I sometimes try to pick meals for a week with common ingredients. Key word: sometimes. I'm not that organized.

First up, Simple Salsa Skillet


Ingredients:
  • 1 green sweet pepper, cut into bite-size strips
  • 1 red sweet pepper, cut into bite size strips
  • 1 tablespoon cooking oil
  • 2 cups cubed cooked potatoes
  • 1 1/2 cups cubed cooked chicken
  • 1 15 1/2-ounce can whole kernel corn, drained
  • 1 15- or 16-ounce can black beans, rinsed and drained
  • 1 16-ounce jar salsa
  • Dairy sour cream (optional)

Directions
1. In a large skillet, cook pepper strips in cooking oil for 2 minutes. Add potatoes, chicken, corn, black beans and salsa. Stir gently.
2. Cover and cook over medium-low heat for about 10 minutes or till mixture is heated through, stirring occasionally. If you like, serve with sour cream. Makes 4 to 6 servings

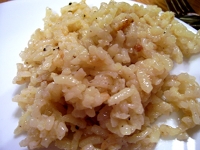
This picture just doesn't do it justice. The Chicken and Vegetables Alfredo with Rice is very tasty.

Ingredients:
  • 4 skinless, boneless chicken breasts
  • 1 Tbsp butter or margarine
  • 2 1/2 frozen stir fry vegetables (or whatever kind you like)
  • 1 1/3 cups instant rice
  • 10 oz. container refrigerated light alfredo sauce
  • 1 cup milk
  • grated parmesan cheese for topping (optional)
Directions:
1. In a large skillet, cook chicken in hot butter over medium heat, 6-8 minutes, turning once. Remove chicken from skillet.
2. Add frozen vegetables, rice, alfredo sauce, and milk to skillet. Bring to a boil, stirring occasionally. Top with chicken and reduce heat.
3. Cover and cook on medium low until chicken is tender and no longer pink, stirring once or twice. Serve with parmesan cheese if desired. Makes 4 servings

All my best,
Robin

Wednesday, April 27, 2011

The Unlonely Fruit


Which fruit is never lonely?


You guessed it--pears. That was kind of a giveaway.

Speaking of giveaways, we are almost at 100 followers. It seems only fair that once we reach 100, we should do a giveaway. Once we reach 100, we'll let you know the specifics. If you're not already following, make sure you start so you can enter to win.


I've been busy updating our little corner of the blogosphere (my excuse for this short little post), so check out our "About the Pear" section for more details.

All my best,
Robin


Tuesday, April 26, 2011

Photo Love


A weekend recap seems awkward at this point in the week, but I am just now getting around to sorting my pictures from Easter weekend. I am obsessive compulsive meticulous about my picture organization, hence the delay. I can't stand all that digital space being cluttered up by bad photos. One must edit and organize.

Here are some photos from our weekend in the Black Hills. We didn't see the hills, mostly just the inside of the in-laws' home. This is fine, because the house is furnished with sweet antiques and decked in turquoise.


We couldn't get enough of this little creature. She was relentless with the bird feeder and kept coming back for more. Seemed to be expecting some kits judging by her size. Is it weird that baby squirrels are called kits? It's also correct to call them pups or kittens. Or you can stick with baby squirrel.

We were due for a little time outside, so we bundled up for a bit.

All my best,
Robin

Monday, April 25, 2011

Me v. Chocolate Easter Bunny

I received a delightful hunk of dark chocolate in the shape of a bunny for Easter. It's not one of those chincy hollow rabbits, either. This thing is made of solid, good for you in small doses, rich dark chocolate. Therein lies the problem. It's too thick and hard to just bite, and flakes when I cut it with a knife. Imagine me standing in the kitchen, chopping desperately at the innocent bunny to no avail. I'm thinking of a chocolate chisel. I've even considered melting it slightly. Pathetic or devoted? You can weigh in on that, but remember, we are talking about dark chocolate here!

While we're talking about food, let's move on to this post's actual content. I constantly hear people saying they always make the same meals, or they hate going to the store and not knowing what to get to make meals. We don't have that issue at the Anderson household (see "wife with overflowing cookbook and recipe ideas"). But I was thinking, "What could help if I did have that issue?"

This is the old school method we use: Every weekend, I find 3-5 recipes I want to make for dinner that week. I pull out the recipes, make a list of the ingredients we don't have, add on our weekly staples, and send the list with my husband to the store. This takes about 15 minutes, and the shopping trip takes 30-45. Pretty quick.

What if you don't have a stockpile of recipes, or don't feel like sorting through the old cookbook, or don't want to make a list? Here's where your blogging host comes in: Go to Monthly Meal Planner. It does all the planning for you. There's a monthly plan for a meal a day, and you can just print the grocery lists from the site for your desired number of days. It's pretty slick and best of all, it's free. Here's a sample of recipes from their website. My family would east most of them, but I would have to figure out what zuppa is first.

Weekly Snapshot
Sun Mon Tue Wed Thu Fri Sat
Breakfast for Dinner Cheesy Rigatoni with a Green Salad Greek Chicken with Cretan Wedding Rice Mediterranean Pita Sandwiches Zuppa Toscana and a Baguette Pasta Primavera with Italian Turkey Sausage BLT Pizza

I'm a sucker for free solutions, and this seems like it would be something I would use during a busy week or when I'm not feeling inspired to cook.

All my best,
Robin

Sunday, April 24, 2011

Chicken Salad Recipe

We return to our regularly scheduled blogging after a short hiatus. We took a weekend trip to see family this weekend, and I just couldn't find the energy to get to posting. But I'm back. So, to make up for the lack of recipe on Friday, here's one:

Chicken Salad with Apple and Basil
Original recipe from Real Simple

Ingredients:
  • 4 6 oz. boneless chicken breasts
  • kosher salt and black pepper
  • 1/4 cup lime juice (from 2-3 limes)
  • 1 tablespoon white wine or rice vinegar
  • 2 tablespoons light brown sugar
  • 4 scallions, thinly sliced (white and light green parts)
  • 2 Granny Smith apples, diced (peeled if desired)
  • 1/3 cup roughly chopped roasted peanuts
  • 2 tablespoons thinly sliced fresh mint (left this out)
  • 1/2 cup thinly sliced fresh basil (gotta be fresh)
Directions:
  1. Pat the chicken dry with paper towels. Pound it to an even thinness.
  2. Place the chicken in a large saucepan and add water to cover by ½ inch. Add 3 teaspoons salt and ½ teaspoon pepper and bring to a gentle simmer.
  3. Cook until no trace of pink remains, 8 to 10 minutes. Transfer to a bowl of ice water for 5 minutes.
  4. Meanwhile, in a large bowl, combine the lime juice, vinegar, and sugar, stirring until the sugar dissolves. Add the scallions and apples and toss.
  5. Drain, pat dry, and dice the chicken. Add it to the apple mixture with the peanuts, mint, basil, 1 teaspoon salt, and ½ teaspoon pepper.
  6. Toss and divide among individual plates

Hope you had a blessed Easter! We sure did. These are some cookies my MIL made and I love the vintage look, along with the vintage bowl~ couldn't resist snapping a couple shots. Or eating one. Okay, maybe two... and some chocolates. It's Easter, what do you expect?

Robin

Thursday, April 21, 2011

Silverware Sneak Peek

I haven't decided how cool or odd it is to hang spray painted silverware on burlap in my dining room yet. I think I like it, but give it a week or two.


We used old silverware from a garage sale, a canvas (gaudily painted by yours truly) and frame we owned, some ribbon, fabric flowers, and some heavy duty glue. The total cost was under $5. Not too shabby for the price. Or should I say, how shabby and chic. I plan to flank it with some other thrifty goodness, but you'll have to stay tuned for that. I can't overwhelm you with too much inspiring decor at once. That's code for "it's not done yet."


Can't wait to get this up on the wall. Thanks for stopping in to check out our latest project!

Tuesday, April 19, 2011

Paint Chip Notepad

Barb is back with a quick and easy tutorial that even the least likely crafters can put together. These would be perfect for an Easter Gift, a May Day surprise, or a small something for Teacher Appreciation week.

How often do you need a little piece of paper to write down a quick phone number or email address or grocery list? Well here's a quick and fun solution that you can create and carry in your purse--a paint chip note pad. To make a note pad, you'll need:
  • One nine inch paint sample card
  • small sheets of plain paper for inside (3 3/4" x 1 3/4")
  • Hole punch
  • Brads
  • Stickers/other embellishments
1. Score the paint sample card at 1 1/4" and 5 1/4", then fold on score lines
2. Center the small pieces of paper under the short fold.

3. Punch two holes through the paint sample card and papers.
4. Insert brads into punched holes. Decorate as desired.

On a final note, we have entered a giveaway over at EisyMorgan that we hope to win. She is having a 30th Birthday bash. How fun!

Linked up at:
Naturally Me Creations
Be Different Act Normal

Craft Envy
Flamingo Toes

Monday, April 18, 2011

Read the Fine Print

It's that time of the week again. The one where I bombard you with technology related tips, tricks, or sites and pray that you'll use em. It's okay if you don't, but do check them out when you're ready. By ready, I mean when you have a few minutes to peruse and feel a bit adventurous.


This week's mini-theme: Reading. Not because I'm a teacher, because reading is good for your brain. And because I like to read online. I'm a teacher and I started a sentence with "and." You like it. Hope you like these next ideas.

Read free books online! You do not need to have an e-reader for this, just an internet connection and a computer-like device. Read Print has online books you can read for free. The ads are distracting at first, but the convenience factor, along with the price, make it a site that might be worth checking out. You can also access short stories and poems.


Now that I've got you reading, or thinking about reading, maybe you realize you don't have the time to do it. No problem, if you've got Read It Later. It's an extension that you can install (by just clicking on the word "Install") to your Internet browser. It allows you to save pages you're interested in instead of cluttering up your bookmarks. This works great for pages you want to read just once and will probably not come back to. Read It Later puts a little icon into your toolbar that you can click on when you've found a page you'd like to read but just can't at the moment. It will save it for you and you can read it later, hence the name. Once you've read it, you can check it off your reading list and it deletes. Pretty swift.

Sunday, April 17, 2011

When a sheet cake just won't do.


We hosted a birthday party this weekend with friends, and I was in charge of dessert. I have been eying a sweet treat each time I set foot in Starbucks, and dying to try to make them. Cake pops-- it's cake on a stick, made famous by Bakerella. Here are some pictures and directions to make your own cake pops for the next special occasion, when a sheet cake just won't do.


What you'll need to make 18 cake pops:
  • 18 oz. boxed cake mix (flavor of choice)
  • 1/2 cup creamy frosting
  • 14 oz. bag candy melts (found mine at Michaels craft store)
  • lollipop sticks (also found at craft store)
  • sprinkles or other decorations
Directions:
1. Bake the cake as directed on box or per recipe.
2. Once cake is cooled, crumble half of it up (freeze other half for next time) in a large bowl with your hands until no large pieces remain
3. Stir in frosting and mix until combined.

4. Use a cookie scoop to make each cake ball approx. the same size and then roll into a ball between your hands. Place on wax paper in the freezer.

5. Freeze until cake balls are no longer sticky, but not rock hard, about an hour.
6. Melt a few candy melts in the microwave for about 20 seconds. Remove and stir. Dip the lollipop stick into melted candy and then stick into cake ball. Return to freezer for another hour.

7.Remove cake balls from freezer. They should be firm.
8. Warm candy melts according to package directions, stirring often.

9. Coat entire cake pop with candy coating and decorate immediately. This part needs to go quick or the decorations won't stick.

10.Store upright using styrofoam or other contraption until coating is hardened. Enjoy with friends.


Today's Creative Blog
Funky Polkadot Giraffe
Running With Glitter
Not Just a Housewife
Blue Cricket Design
Sugar and Dots
Tea Rose Home
EisyMorgan


Somewhat Simple
Katie's Nesting Spot
What Allie's Making Now
Fireflies and Jellybeans
The Shabby Chic Cottage
Gluesticks
While He Was Napping
Whipperberry
Simple Home Life
Fingerprints on the Fridge
Fun to Craft
Naturally Me Creations
Juice Box Dreams

Thursday, April 14, 2011

Stir Fryday

To make up for my last two high-calorie recipes, I thought I'd share one that is on the healthier side. We try to stick to a low fat, high fiber, full of veggies and fruits kind of eating style around here. But then life happens and someone has a birthday or an anniversary or a craving. We might lose focus in the presence of cupcakes or dark chocolate, but we regain strength at meal time, and cook something with less than 300 calories, like this:


Pork Stir Fry with Garlic (I'm going to try this with chicken, too.)

Ingredients:
  • 3 cups broccoli, chopped into one inch pieces
  • 3/4 cup reduced sodium chicken broth
  • 1/2 cup chopped scallions (fancy term for green onions)
  • 2 Tbsp. minced garlic
  • 2 tsp. olive oil
  • 1 cup chopped onion
  • 1 red bell pepper, chopped
  • 1 lb boneless pork tenderloin, cut into 1/2" by 2" strips
  • 1 Tbsp reduced sodium soy sauce
  • 1 Tbsp. toasted sesame seeds
  • 2 Tbsp. chopped ginger. ( I used the ground ginger from the spice aisle....half the amount)

1. Steam broccoli about 2 minutes until bright green. Drain and rinse with cold water to stop cooking.
2. Combine 1/4 cup broth with scallions, garlic, and ginger in food processor/blender and pulse until mixture is finely chopped.
3. Heat 1 tsp. of the oil in a large skillet or wok over med. high heat. Add onions and bell peppers. Saute 5 minutes or until vegetables are tender. Transfer to a bowl and cover to retain heat.
4. Add remaining oil to pan over med. high heat. Add scallion mixture and saute 1 minute, stirring constantly. Add pork and soy sauce and saute 4 minutes or until pork is nearly cooked. Add remaining broth and bring to a boil.
5. Add broccoli to pan and stir until cooked through, about 3 minutes. Add onions and peppers back to pan.
6. Divide between plates and sprinkle with sesame seeds.

Wednesday, April 13, 2011

Take a Look....It's in a Book


I am a teacher, so naturally I'm an advocate for reading. I read all the time: blogs, magazines, and picture books. These count as reading! Trust me, I'm a teacher-- I know these things. I read real grown-up books too, just not as much as I'd like.

To pass on the love for reading and the patterns of speech, we have been reading to Button Boy nearly every day since his birth. At first he didn't notice what was happening, and this was fun. He was an excellent listener, and we felt like awesome parents, exposing our wee one to literature so early in life. As the months went by, he became less interested. When I say less interested, I mean let's chew on the board book until the pages are dilapidated and have expanded to three times their normal size. Or how about we turn this into a fun game of "drop the book on the floor, look surprised, then in the cutest voice possible say 'uh-oh.'" Needless to say, he wasn't an avid reader.

Until now! We have now turned to a new chapter in his reading adventures. Pardon the pun, I couldn't resist. My son now enjoys books! Mostly just the ones where you get to touch different textures, but a book nonetheless.

We are reaching lots of fun milestones as he ages, and this one is exciting for us. We may just put away the singing frog now that we have a new hobby.

Tuesday, April 12, 2011

Rosettes: How and Why

Everywhere I look in blogland I find rosettes. I see em on jewelry, on walls, on art, thrown together in bowls, on t-shirts, pinned on to scarves. You name it, it can have a rosette on it.

I'm not one to often follow trends. Not because I don't want to be trendy or fashionable, but mostly because I am too cheap frugal and lazy busy to keep up on these things. Rosettes, however, I can totally do. Mostly because Mama Pear showed me the ropes. Plus, there are tons of tutorials out there, as well as lots of ideas for inspiration.

Because I told you it'd be coming, here is my quick tutorial for making a fabric rosette:
What you need:
  • 1.5 to 3 inch wide strip of material. The strip should be around 24 inches or more.
  • scissors
  • hot glue gun with glue
  • embellishments, such as buttons and ribbons

1. Create long strips of fabric, using the dimensions listed above.

2. Fold the fabric strip in half the long way, so it is about 1 inch wide (depending on starting size)
3. Tie a small knot at one end of the fabric.

4. Twist the loose end of the fabric slightly and begin wrapping it around the knot. Hot glue to hold together as you form the flower.

5. Continue twisting the fabric and gluing until it reaches your desired size.

6. Cut fabric and secure with hot glue to the back side.
7. Embellish and add to your favorite project.

The best part is you can use fabric you already have on hand. Sort of a stash-buster craft project. Here are some other rosette ideas to help you get your roll on.


Natsprat has an eye for rosettes. I am in love with the bold colors, and plan to try this wreath!
Nichelle from Vintage Wanna Bee embellished these shoes. Delightful, huh? I think so.

Cami from You Seriously Made That? has a fabulous tutorial for rosette hair accessories. Head over there.

Don't see something you love, but like the idea? Google it, and enjoy the rosette ride of your life. There are innumerable options for their use and just as many ways to create them. Enjoy!