Showing posts with label home decorating. Show all posts

Wednesday, March 21, 2012

Paint Chip Train and a Bus


Surely you've already hopped aboard the ever-popular paint-chip-art train? What? You haven't robbed your local hardware store of all the season's colors in the name of crafting? Get on it. Barb has been planning this project for a while, and we just got around to completing it yesterday. I use the term "we" loosely. I glued and she pretty much did the rest. This little piece of art began as an ugly thrift store find, and is now a pretty paint chip frame to hang in her craft room. Here are the details:

Materials:
-thrifted canvas, wood painting, or other base of your choice
-stolen paint chips
-spray adhesive
-antiquing medium
-chipboard letters
-spray paint
-E6000 adhesive


Here's the starting point: a delightful fruit basket complete with flowers. Because who doesn't mix a little baby's breath in with their fresh produce?
Adhere the paint chips to your surface. We used an antiquing from Hobby Lobby after this, but didn't photograph it.
Arrange your chip board letters on the back piece. We spray painted ours white so they would really pop out when hanging on the wall. Use E6000 or another adhesive to get your letters to stay on .
If you're checking out that backwards "t", it was intentional. Geez, think outside the box, wouldya?

In other news, my two-year old is obsessed with buses. Like, they seem to consume his every thought, won't go to bed without one kind of deal. Guess it's healthier than my obsession with chocolate chip cookies. I let him watch youtube videos of the "Wheels on the Bus" videos on half my screen while I'm on the computer. This one is my favorite.


Thursday, November 3, 2011

Bird Mobile


You were thinking of a avian-inspired vehicle when you read that title? Our nursery is a multi-colored mix of polka dots, stripes, owls, birds, and whatever else our toddler decides to drag in there. This mobile, which I constructed with help from both mother and husband nearly two years ago, has yet to be hung above the crib. It currently hangs from the curtain rod. Cute, but not its intended purpose. I am determined to get it up before baby number two uses the crib.

Here's what we used:
-stuffed bird pattern (PDF) and scrap fabrics, stuffing
-thin rope to hang birds
-thicker rope to suspend mobile
-hot glue
-two wooden hangers
-drill/pliers, screw


Directions:
1. Sew the birds according to the pattern from Lollychops
2. Using a pliers, straighten the hook of the top hanger. Unscrew or use a wire cutter to remove the hook from the bottom hanger.
3. Drill a small hole through the center of both wooden hangers. Secure them together with a screw.
4. Hot glue rope to the top of each bird, hang onto hangers and secure with hot glue.
5. For the top, thicker rope, we knotted it, hot glued it, then wrapped it in a coil. It's sort of a hodge-podge process--whatever is secure and works for you.

Yes, my photography skills are lacking in these photos. There are only so many hours of natural light these days. You get the gist, though.


Friday, October 14, 2011

Decorative Bean Balls


Barb crafted up these sweet little styro-covered spheres for display in my kitchen. To make, she glued different types of beans and peas onto styrofoam balls. There are a variety of sizes and colors to add a little visual interest. To display, I'll stack them up in a clear jar, and maybe use some as a centerpiece a little later on.

Tuesday, September 6, 2011

Necklace Holder and Decor

Though I do not wear some of these necklaces often, they look great hanging on our wall. I had a plaque that had some wording on it, and decided it was the perfect size for this. I peeled off the words, painted it white, then my handyman drilled some holes and cut the ends of the knobs off (so they wouldn't hit the wall behind). The knobs we got from Hobby Lobby at half price, and we had the little plaque, so this beauty cost about $15. Here it above my makeshift end table:

Thursday, September 1, 2011

Furniture Revamp


I have an uncontrollable urge to sweep everything off our kitchen island into the garbage. It drives me nuts how much stuff piles up on my limited kitchen workspace. Never mind that most of the junk is mine. Well, I've solved that problem, I think. Enter: five dollar record player stand. The previous owner tells me that's what it is anyway. It's got shelves inside to house plenty of albums and room for the record player on top. What I saw was a great way to conceal all our extra "counter junk," an accessible spot for the camera, and a colorful addition to our living/dining room area.

So here's the process:

1. Purchase the piece and haul it home. Convince your husband it's awesome.
2 . Clean it up and remove handles.

3. Sand with an electric sander, do the details by hand.
4. Prime and paint. Paint another coat. Then another. Adorn with some cute hardware. Store and hide all your junk inside.
Not the best after picture, but you get the drift. We need to get a latch and baby lock to keep the door closed, but I love my new concealed storage.

Monday, August 29, 2011

Our Fun House...with mirrors

After a productive weekend, I have plenty of sweet stuff to share with you. I'll do my best to stop being a blogging slacker and put all the coolness onto this here blog instead of hoarding it in this little house of mine.

First, a disclaimer. I may mention that "I did this" or "I did that" in these next few posts. I am the creative mastermind behind these projects, but my assistant turned carpenter/painter/handy man husband did most of the doing. I directed. And complimented his skills, of course. Cause aint nobody else lining up to help me hang stuff and spray paint all my garage sale finds.


Check out our wall of mirrors. Don't think of the creepy fun-house mirrors at the carnival. Think of the non creepy but welcoming fun house I live in.
Linked up at Lines Across my Face


Tuesday, August 16, 2011

Canvas Prints Nursery Tour

Back to the nursery tour. Above our little guy's crib hang three whimsical canvases. Made by our good friend Megan, these square canvases were first painted with acrylic paint in three coordinating colors. We found some clip art we liked on the Internet and used those as inspiration. After buying plenty of coordinating paper, we went to work cutting and layering the shapes on to make our owls and tree. Megan used Mod Podge to adhere the paper, though a few bubbles did show up. I replicated this project shortly after and experienced a few air pockets as well, but nothing that can't be smoothed out. The key to keeping these kind of projects looking interesting is lots of layers and variety of colors/patterns. I love these little guys and they will be hanging around our house for a long time.


Thursday, August 11, 2011

More Polka Dots: A Quilt

Time for a tour of our little guy's room. I'll show you a few of his decos for the next few posts and hopefully give you some inspiration.

Could not tell you what pattern we used for this delightful little quilt. If I find it, I will let you know. It was a little smaller than crib size, so we added a row of squares. The circles were cut with a special circle cutting tool my mom found at a craft store. We heat n' bonded them together and then zig-zag stitched over the top to reinforce.


In this post, I shall refer to "we" when discussing the construction. This we is my crafty mom, my talented aunt, and me. I did plenty of cutting and ironing and some sewing.


I like the neutral colors--perfect for a boy or girl. Of course I love the polka dots.


Tuesday, July 12, 2011

Take a Seat...on our new bench


My parents had this old bench collecting dust in their basement, and told us we could have it. Free? Yes please. I didn't take a before picture. Use your imagination on this one--it was the same bench with worn off dark stain.

We encourage our guests to remove their shoes, but thought this would make it even easier. You know how awkward it is take off some shoes standing up...or is that just me? The bench also serves as our landing strip, aka throw all the stuff you just drug into the house here. Until company comes. Then it's time to get serious and pick up the crap. Here is the process and finished bench:

1. Sand bench until smooth, paint with spray paint
2.. Print out your last name in a word document using a font you like. I found one at dafont.com.
3. Carefully cut out each letter.
4. Using a Sharpie, trace the letters onto the bench.
*Or you can be efficient and use a stencil or Cricut and combine steps 1-4*

5. Fill in the letters with a few layers of acrylic paint.

6. Spray with lacquer to protect.
I free-handed the little scrolly guys on either side. The bench is nice, but I'm not sure I love it. I'm going to leave it this way for a while, though. Why? Because my mom told me to. I'm sure she had visions of my husband's rolling eyes as I asked him to help repaint it. She's a smart woman. I might add a little basket for our outdoor essentials. You know, because I love watching my little guy dump stuff out and then helping him pick it up.

All my best,
Robin

Tuesday, June 28, 2011

Happy Anniversary!


Today marks two years of being married to my best friend. He is the guy who not only helps me parent our little one and supports me in everything, but is also my biggest cheering section and a voice of reason in those "rare" moments when I lose it....just a little. I'm happy to be married to this one--he's a keeper.

We are keeping our celebration simple this year, and taking it easy on gifts as well. I couldn't resist this print from Define Design 11, though. She makes custom special occasion prints that are personalized in such a quirky, sweet way. Here's the one we'll hang in our home:

The picture doesn't do it justice...it's way cuter than it appears here. But you get the concept. I love that the heart pinpoints our wedding location.

All my best,
Robin

Thursday, June 23, 2011

Flower Power to the Rocker

Technically, it's "Good Food Friday." Technically, I've been a terrible blogger. So, rather than share a recipe with you (I have one, just made it this week, and it's awesome), I thought I'd do my best to impress you with a righteous rocker redo I've been working on. Technically not a redo, but a little makeover, if you will.

It started out as shown in the picture above. The rich brown shade is one of my favorites, but after living with it for a while, I started to realize how many neutrals, especially brown, I had going on around this chair. Here's a visual:
Like the random objects placed haphazardly on the piano? It's called "anything breakable gets set on the nearest high object." Too much brown, though. You agree?

I found this decorator fabric at Hobby Lobby and fell in love. I knew it would spruce up the glider. It's been in my drawer for months-- the pattern and colors....yum! To make it, I didn't do anything technical. I basically laid the cushions down and pinned the fabric to fit snugly around them. After machine sewing around three sides, I hand stitched one side and could adjust the fit that way too. I am pleased with the visual interest it adds to the space, and this motivates me to get more house projects done!

All my best,
Robin

Thursday, June 9, 2011

Lamp Love: A Redo

Friday seems as good a day as any to share with you my latest and greatest project. This replaces Good Food Friday today, as there hasn't been much good food around these parts. I've taken a brief sabbatical from cooking and have focused my attention in a hundred other places. One of them, decking out our little home. This lamp redo was inspired by one over at Crafting in the Rain. Hers was so cute I had to do one for our living room. Here is how it went down:
1. I purchased this lamp at a garage sale for $1. Not hideous, but not fabulous either.

2. I purchased a yard of white polka dot fabric. My inspiration shade was white, so I thought it was a good idea. It wasn't. Halfway through, I realized it was looking like it belonged in a young girl's bedroom. But I have pictures of the next step in white anyway: cut into four inch strips. Fold the strip in half and iron it on the fold.


3. Every few inches, fold the fabric over to form a pleat and pin into place. Once you have the length of your fabric pinned, sew across the top (near raw edge) of fabric, making the bottom of the pleat a finished, folded edge. You may need to put two strips together if your shade is large. Iron the pleats down.

4. Hot glue the pleated strips on to the lamp shade, joining at the back and overlapping slightly. I used 2 prints...One I had on hand, the other I found on clearance to replace the white. While this was happening, my husband was graciously spray painting the base for me with paint left over from our silverware hanging.


5. I finished the top by gluing on some white bias tape I had on hand and then adding a little rick rack. It turned out a little whimsical/vintage and fits in with our eclectic decor.

I finished the project in about two hours and for less than five bucks.

All my best,
Robin

Thursday, April 21, 2011

Silverware Sneak Peek

I haven't decided how cool or odd it is to hang spray painted silverware on burlap in my dining room yet. I think I like it, but give it a week or two.


We used old silverware from a garage sale, a canvas (gaudily painted by yours truly) and frame we owned, some ribbon, fabric flowers, and some heavy duty glue. The total cost was under $5. Not too shabby for the price. Or should I say, how shabby and chic. I plan to flank it with some other thrifty goodness, but you'll have to stay tuned for that. I can't overwhelm you with too much inspiring decor at once. That's code for "it's not done yet."


Can't wait to get this up on the wall. Thanks for stopping in to check out our latest project!

Sunday, April 10, 2011

Barb's Magnet Board

Welcome back to my hideout! This is where my crafty creations begin and end. My craft room is painted a cheery yellow with green print curtains from the Debbie Mum line. You'll find my creations throughout the room, as well as ideas for inspiration.

What I want to highlight is my new magnetic board that my husband helped me hang. I had seen something something similar in cyberspace and thought it was a great idea. We had the metal on hand in my husband's shop, so all we had to do was attach it to the wall with screws.

To make the board more functional, I covered tin cans with scrapbook paper, ribbons, and stickers. To keep them in place, I hot glued three magnets to the back of each. These keep all my gadgets easy to reach but out of my way when crafting.

The hanging hooks are from Walmart, and again I attached some strong magnets. These hooks are perfect for scissors and tape. I always have a notepad hanging to jot down supplies to shop for or random thoughts while crafting.

I created the large rock magnets for Christmas gifts and thought I needed a few. To make, I used clear stones and ModPodged paper/stickers on to the back. Again, hot glue a magnet. Thanks for visiting my corner of craftiness!

Wednesday, April 6, 2011

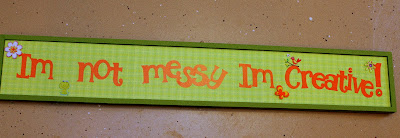
Barb is creative, not messy.

For those of you just joining us, Barb's posts, always crafty, always fun, always enjoyable, will always be in red. Or they will for now anyway.


I've had this saying hanging on my bulletin board for a long time, waiting for just the right way to use it in my craft room. I picked this wall hanging up on Christmas clearance. At first I thought about putting our last name on it and hanging it above a door, then I thought about that quote I've had hanging up. I glued paper on the inside and used craft paint for the border. Using my Cricut, I used the "Alphalicious" cartridge and cut the words out of orange vinyl. I added some stickers and a little bling to give it some dimension. One must embellish. It looks great above my magnet board (you'll see that soon!) and really sums up my craft room--cause sometimes it's a total mess. The before and after


You didn't think I'd let her post without putting my two cents in, did you? She's right--her room is sometimes a mess. That's what's so great about it--you don't feel bad letting your creative juices flow and adding to the chaos when you craft with Barb.

Even if you don't have a Cricut, you could do this with a word document, some transfer paper, and glue, or make it work your own way. Any kind of wall hanging will you--if you can find a way to glue on to it, you can "upcycle" it.

Tuesday, April 5, 2011

Sowing Dandelion Seeds

What kid doesn't love blowing on a dried dandelion, watching the pieces fly away? I know I did. Still do. To honor that childlike whimsy we decided to put up a vinyl in our bedroom with some common yard weeds:

We had a large wall space that called for something significant. We chose white in order for it to "pop" and it definitely does. It fits perfectly with the personality of our bedroom, but we had a hard time choosing just the right one. It took me a week to finally order it once we picked it out. I have commitment issues with online purchases. Not a bad thing to have, in my opinion.

We purchased it from an etsy shop. If you're unfamiliar with etsy, give it a shot. If you're one to get sucked into the Internet, proceed with caution.

The vinyl was not too tough to put up, but was a little time consuming--maybe an hour. It's a pretty simple process, and most dealers send excellent directions for applying. It's one of those tedious jobs that is kinda fun to do because you get instant results.

Here are some of the other options we browsed through before settling on our beauty. Key word=some. I could spend my days posting etsy vinyl decals, but that wouldn't be very exciting for either of us.

All of these designs can be purchased at etsy. If you are interested in these specific ones, once you arrive at the site, search "vinyl wall decals flowers."