Monday, November 12, 2012

Pretzel Crusted Chicken

If you learn how to cook one meal, this is the one. It would be great for company or a quick meal at home. It doesn't require much time and tastes amazing.  Serve it up  with some salad and you're good to go. Plus, you get to pound the chicken.  You'll feel like a ninja when you're done.  And then you still get to eat.

The recipe is originally from Taste of Home's magazine.  Many kudos to contibutor Kerri Balliet for giving me my new favorite meal.

Pretzel-Crusted Chicken with Mixed Greens 

Ingredients
-2 cups sourdough pretzels
-1/2 cup flour
-eggs
-1/4 cup buttermilk ( I used half &half)
-2 garlic cloves, minced
-1/8 tsp. pepper (more if you dare)
-5 Tbsp olive oil, divided
-4 chicken breasts
-2/3 cup mayo
-2 Tbsp. Dijon mustard
-2 tsp. cider vinegar
-1/8 tsp. salt
-1/8 tsp. pepper
-1 pkg salad greens

Directions:
1. Crush pretzels in a food processor or baggie with a mallet.  Place pretzels and flour in separate shallow bowls.  In another shallow bowl, whisk the eggs, buttermilk, garlic and pepper.  Pound chicken to 1/4 inch thickness.  Dip both sides of chicken in flour, egg mixture, and then pretzel crumbs.
2. In a large skillet, heat 3 Tbsp. oil over medium heat.  Add chicken; cook for 4-6 minutes on each side or until no longer pink.
3. Meanwhile, in a small bow, mix mayo and mustard.  Remove 2 Tbsp. to another bowl for dressing.  Whisk in remaining oil, vinegar, salt and pepper.
4. Drizzle saald greens with dressing.  Serve remaining mayonnaise mixture over chicken.

Saturday, November 10, 2012

Thankful for Coloring

I am so thankful for you checking my blog today.  I have so much information and numerous projects to tell you about, but no high-quality, edited photos to illustrate how crafty I truly am.  Instead, here is a peek of some of my daily life.  I am so grateful to be living it.  

 "You wanna color by me mama?"  All other tasks on my list are out the window.  I cherish these minutes!

 Today I hosted a family "Crafty Crap" day.  The goal was to bring a project you've started and want to finish.  I finished nothing.  Just started more, like this pile of old-sweaters that want to become mittens.
 Thank you, Target, for these sparkly ornaments placed strategically in the dollar section.  It's way too early for Christmas deco, but I couldn't pass them up.
 I tried these pumpkin spice drinks.  Originally from a blog, pinned by a friend.  They're nasty.  Don't do it.  It may be tempting, but even the whipped cream cannot mask the badness of these.
 Speaking of nasty, is this not the most festive pile of garbage ever?  I sweep at least once per day (I swear!) and this is my pile from today.  It looks like an "I Spy", right?
Knit much?  Yeah, obviously not.  I have two kids, that's my excuse.  Oh and that whole not finishing thing. 

Thank you for stopping by my little space today.  
Much love,
Robin

Thursday, September 27, 2012

Ham and Cheese Twists

These beauties are perfect for parties, laid-back weekends, or an after-school snack.

I dreamt about these one night.  Really.  It was so lucid that I woke up thinking I had actually made them. Two days and three ingredients later, they were just as good.  We had to pick up just one ingredient for these tasty bites, and they were quick, simple, and delicious.

Ham & Cheese Swirls (or Twists, I can't decide)

Ingredients:
  • 1 package canned breadsticks 
  • 12 slices ham deli meat
  • 3 mozzarella cheese sticks  
Instructions:
1. Cut the cheese sticks into fourths, roll with ham.
2.  Stretch the breadstick pieces into a long, thin piece and wrap around ham, securing the ends.
3.  Bake at 350 for 7-10 minutes
*While baking, I brushed  a little butter on the top of each twist for added flavor and that golden look.

Experiment with different combinations of lunch meat and cheese.  I might try ham and swiss or turkey and american.  


Wednesday, September 12, 2012

Starstruck

This is not a craft post.  This is not surprising, because on this here "craft blog"  there have not been too many of those lately.  What gives?  Mostly my inability to photograph projects and recipes though photography is one thing I've really been working on.  Mostly I've just been doing my best to love every free second with my little boys and trying to keep my house from appearing on "Hoarders."

I did have a little time to do something for myself last month and wanted to share it here with you.  I met my all-time favorite singer/songwriter!!!  My husband and I took a little trip sans kids to Nashville to see Lori Mckenna play.  As a bonus, we stayed with a couple close friends.   It turned out to be a beautiful night, and I enjoyed every minute of the concert.  Afterward, I got a minute to meet Lori and stammer out a few words of admiration and snap a picture. Did I mention she gave me a hug?  Maybe it was because she felt bad that I had traveled all the way from South Dakota.  Or that I appeared unable to form sentence.  Or maybe she is just that sweet.   I fell in love with her music in 2005 when I heard one of her songs on college radio in Massachusetts, and have been obsessed with her music since.  You can check her site through my link above, and even score a free tune from there.  

This is not the most flattering picture of her, but you get the idea...Lori Mckenna mid-song


 I've been a fan for like, um, ever, and you are amazing and humble and err..I'm from South Dakota (why did I need to say that?) and I loved the concert...Oh did I mention I called myself "Lori Mckenna Superfan"???


 We hugged it out.  

 This cheese-tastic expression on my face pretty much sums up the entire experience. 


There you have it.  Now I'll go craft.  

Wednesday, August 22, 2012

Teacher Gift Dos and Don'ts

I thought about not writing this post because it might seem like I am
a. a brat
b. ungrateful
c. rude

but then I realized that my intent is to be

d. honest
e. informative
f. amusing


We know it's back to school time, but let's not get too crazy with the apple/school bus/pencil themed gifts just yet.  I am here to serve as your personal teacher gift concierge, to assist you with all your teacher-gift buying needs.  Some people may not make a habit of sending a gift on the first day.  If this is you, pin this and stop back around Christmas.  If you're a beginning of the year giver, please read on.

*Disclaimer: Teachers (Myself included) do not expect gifts from students, and are generally surprised and appreciative (myself included) when they receive them.

5 Teacher Gifts to Reconsider

1. Coffee mug.   So the teacher drinks coffee.  He/she probably owns plenty of these already.
2. Knick knacks.   How many little figurines can one person have?
3. Bath & body products.  Unless you know the specific brand and scent, this is dangerous territory. Especially shy away of the bargain ones.  We know you picked that up in the dollar aisle.
4.  Jewelry, specifically school related.  No one needs to be sporting a schoolhouse brooch.  Exceptions are fun or trendy pieces you might pick up for yourself.
5. Anything school-themed.  Just because you can personalize a tote that says "Mrs. Anderson, World's Greatest Teacher" doesn't mean you should.  We teach because we love kids, not apples and rulers and primary colors.

5 Teacher Gifts that are Fail-safe

1. A note from your child or you.  I save all of these, and they mean a lot to me.
2.  Food.  This one is tricky, so be observant.  If the teacher is health-conscious, stick with fruit or another healthy snack.  If she's into chocolate or candy, opt for those.  The key here is be observant.  Or ask the teacher's colleague.
3.  Hand sanitizer or disinfectant wipes.  Not all teachers might love this, but I'm all for killing some germs.
4. Gift Card.  This could be to somewhere for supplies or for the teacher's personal enjoyment
5. Drinks.  Again, be observant here.  Have you noticed there's always a diet coke on the teacher's desk, or that they're partial to bottled water?  Your student can watch for this too.

Friday, August 10, 2012

Goodies You've Pinned

I have completed a ton of projects.  Clothes repurposing, sewing, knitting, furniture upgrades, recipes, etc.  And then I have this here blog that is designed to feature all the goodies.  Can I get my act together to put the two together?  Possibly :)

Today shall be a Pinteresty post.  I got most of the ideas from there.  Now, before I show you these, please know that I am a finicky user in that I don't just peruse Pinterest, repin some junk then move on.  I mostly read blogs and pin from there, and if I do get an idea straight from Pinterest, I always go to the link first, check out the site and maybe subscribe to the blog while I'm there.  There's my rant.  Check the link, read the blogs.  If you don't I will be annoyed when your link from Pinterest is faulty.  But I will probably keep following you anyway because you more than likely have good taste.  Especially if you're here reading this.  On with the projects.  

First up, BBQ Chicken Quinoa Salad.  Tastier than my picture might reveal.  Iowa Girl Eats just makes her food look so much better! Love her blog--I print off and try her recipes at least weekly.  


Second, I saw this idea a gazillion times on Pinny.  It's awesome--just give your kids some glowsticks in the tub, turn off the light, and prepare to hang out in the bathroom for at least 45 minutes.  


This picture comes straight from Chef in Training, who originated the Pinterest phenom Chicken Cordon Bleu Pasta.  Definitely not a light dish, but twas well received in my household.


Got water balloons?  Use em up before summer's over.  We celebrated 4th of July with a little target practice.  Draw some circles, targets, or other shape on the concrete with chalk and let the kiddies (or adults) go wild.  Good for at least five minutes of fun, and no one walks away with welts or bruises.

Monday, July 9, 2012

My Fave DIY Cleaning Products


Household cleaners and detergents can get spendy.  That's why I don't buy em.  I still clean (sometimes) and do laundry (all the time) but at a much lower cost, because I make almost all the cleaners that I need.  I've tried out many recipes, and here are the ones I like the best.  Get ready for a no-picture post.  Why?  Because you don't want to see pictures of old o.j. containers filled with laundry detergent and a Lysol spray bottle written over in permanent marker.  Thrifty and green: yes.  Attractive: no.  

1. Liquid Laundry Detergent

4  Cups - hot tap water
1  Fels-Naptha soap bar
1 Cup Washing Soda
½ Cup Borax

- Grate the bar of soap and add to saucepan with water. Stir continually over medium-low heat until soap dissolves and is melted.
-Fill a 5 gallon bucket half full of hot tap water. Add melted soap, washing soda and Borax. Stir well until all powder is dissolved. Fill bucket to top with more hot water. Stir, cover and let sit overnight to thicken.
-Stir and fill a clean container half full with soap and then fill rest of way with water. Shake before each use. (will gel)

*There are plenty of other recipes out there too.  I have tried the powder recipe also, which is more convenient to store.  It was not nearly as cost effective and a bit more labor intensive.  Plus, HE washers generally don't take powder.

2. General Purpose Cleaner

Fill a jar or other container with vinegar.  Add slices of orange, lemon, or lime.  Let sit for a couple days.  Remove the citrus peels.  Pour a spray bottle half full of vinegar and top off with water.  

This one is great for everyday spills, countertops, bathrooms, etc.

3.  Laminate Floor Cleaner

1 cup water
1 cup white vinegar
1 cup isopropyl alcohol
few drops natural dish soap

Mix all the ingredients together in a spray bottle.  Spray in a fine mist over floor and leave if for a few minutes.  Rub off using a microfiber or other cloth.  I use my Swiffer sweeper with a microfiber cloth or old cloth diaper attached--works great!

4. Dishwasher Detergent

  • 6 cups Borax
  • 6 cups Washing Soda
  • 3 Cups Kosher salt
  • small container Lemi Shine (can also use lemonade packets)


  • Combine all ingredients and store in an airtight container.  Fill dishwasher detergent compartment for each load.

    I usually use a rinse aid as well.  You can give vinegar a shot for this.

    Still to try:
    -homemade stain remover
    -homemade fabric softener

    Can you see a trend here?  You can spend a few bucks and get all the supplies together, as most are common among all the recipes.  I am definitely not the expert on these, but have tested all these and continue to use them.  

    Wednesday, June 27, 2012

    On the Cheap Vol. I

    1.  Ditch the paper towels (or significantly decrease your consumption).  Paper towels get spendy.  Sure these little guys are handy, but at a price.  At $1.50-$2.50 per roll, the cost of these disposable items adds up.  We used them because we didn't like the idea of a damp, bacteria filled washrag sitting in the sink.  Solution:  Buy a couple packs of bar mop rags ($5.00 for a package of eight at WM) and use them like we would a paper towel.  Toss them in the laundry and use again.  Cost savings per year:  $50


    Pic and great info found here

    2.  Cloth diapers.  I am SO not the expert on these, and there are thousands of sites, forums, and blogs devoted to the art of cloth diapering.  Let's just say these are not your mama's fold and pin diapers.  We use Fuzzibunz diapers and have since our two year old was born.  Baby number two is also in cloth.  Sure, you have to worry about washing them, but for the price savings and "green factor," it's worth it for our growing family.  We are keeping a huge amount of trash out of landfills, and saving around twenty cents each time we put one of our little guys in cloth.  The diapers are a bit of investment in the beginning, but are totally worth it as you use them longer.  We get ours here.  Cost savings per year for a family with two in diapers: $400.

    3.  Coupon or Groupon.    I'm not talking about the crazy couponing strategies seen on reality tv (Seriously though, where do they get the time, energy, and fliers for that?  And who needs 50 boxes of cake mix?).  I don't line up my shopping with weekly sales or coupons.  One thing I do every week before we head to the store, though, is go to coupons.com and print a few coupons.  I print anything I think we might need in the next month or so, and then when it's on our list I just happen to have a coupon.  Sometimes the stars align and I find coupons for what I need that week, and other times we don't use any.  It's not rocket science, nor is it difficult, but it has saved me from every paying full price for cereal or soap.  Cost savings per year: $50

    I am not a weathered Groupon user, but I have purchased a few experience/food related groupons, and they were great deals.  It's a great way to pay for a date night dinner at half price or a trip to the water park at BOGO.   Sign up is free, and you only buy something when it's a perfect fit.  Our best Groupon purchase?  Meat from a local market at half price.

    Friday, June 8, 2012

    On the Cheap

    I quit my job.  Good start to the post, eh?  I'm nervously excited to say that I am taking a temporary break from teaching to be a mom.  I have been wanting to do this since my first baby was born, and have finally made the leap.

    There are many new adventures to come, I'm sure, one of them being our ability to stay afloat financially. Many people say to me "That's awesome that you guys can make it work with one income."  Key words: make it work (said Tim Gunn style).  It would be awesome to not have to worry about money and stay home with no concerns, but what challenge would that be?

    While I'm beginning my new adventure as a SAHM  (I totally already know the acronym...how savvy of a mom am I?) I'll be sharing my penny pinching ideas in a series called "On the Cheap."  While I am not the pioneer of frugality, I love me a good bargain or money-saving tip.   So I'll provide you with some goodies, sifted through and hand-picked and experimented with by yours truly.

    "On the Cheap"  Series:  Coming Soon!

    Wednesday, May 30, 2012

    You can call me Senora

    In an effort to become more amazing in the kitchen and save a little cash, I decided to stop purchasing tortillas at the store and start making my own.  As an added bonus, my homemade tortillas contain less preservatives and taste way better than any that I've purchased.

    I found a recipe to put together a jar of tortilla mix here.  I followed the directions and stored the mix in an old pickle jar.  When ready to use the tortillas, I mixed, let rise, rolled, and slapped those babies on the griddle (my skillet, actually, I'm not that awesome).  I won't repeat the directions, you can find them on the link, but I will share some HQ photos with you.  By HQ I mean high quality, and by high quality I mean crappy.  Our kitchen is not well lit and we at the Anderson house do not have the food photography thing down yet.  But we can make some mean tortillas.


    My best advice if you decide to make these is roll out the dough very thin...if it's too thick it's more like a fry-bread.  The website tells me that these cost $0.25 to make ten of these--much thriftier than my old package for $3.00.


    Monday, May 21, 2012

    Store and Organize Childhood Memories

    "Cherish the time when your kids are small...it goes by so fast." I have heard this a thousand times, and probably will say to young moms at the grocery store when my kids are teenagers and no longer want to be seen with me in public. It's great advice, really, and I work hard to be present in the moments I spend with family and friends. I try to soak up the baby coos and the new words my toddler is saying, and enjoy watching them try new things and reach milestones. But while I'm busy being present, there is a voice in my head shouting "IS SOMEONE WRITING THIS DOWN? WHO'S TAKING PICTURES OF THIS?" I want to be in the moment with my little guys and just enjoy them, but the crazy organized part of my brain says I need to be putting this info somewhere, for both my kids and me to look back at some day.


    Here is how (without going overboard and driving myself crazy) I document my kids' everyday anecdotes, as well as milestones and photos:

    -A monthly email to each of my kiddos.  This is just an informal message I send to them, usually telling them how special they are to me, what they've been doing and any milestones they've come upon.  Before my 2 year old was talking in sentences, I was writing down his new words as well.  We set up email addresses for both kids, one at gmail and one at yahoo (to get the same format: firstnamemiddlelastname@emailservice.com. We set the email up and are the "users," but as the boys get older they'll be able to look back and see all their messages from me.  Because I'm a little type-A, I also print each message and stick it in their baby book.

    -That brings me to the baby book.  I fill these out, but they're not very personal and some of the pages are not awesome.  For instance, the "New foods I've tried" section on the 1 month-6 month pages.  hmmm.

    -Notebook for funny quotes or happenings:  I have two little notebooks (one for each kid) in our kitchen that are easy to get to.  When something funny or noteworthy happens, I jot it down along with the date.  I figure these will be great when I want to tell my kids stories about funny things they've done.

    -Pictures and videos:  We have a video camera, but my husband's Droid is much more accessible, as he always has it on his person.  We shoot videos at least twice a week, usually of the normal everyday stuff kids say and do.  We also have a camera that I am slowly learning to use.  One of my goals this year is to be a better photographer, so I'm taking pictures every day.  After I take them, I use my short amount of free time to upload, edit, and organize onto my computer.  Jen at A Thousand Words blogged about how to organize pictures on the computer.  I am following her advice on labeling the pictures and have found it to suit my compulsive need to organize very well.  

    Wednesday, March 21, 2012

    Paint Chip Train and a Bus


    Surely you've already hopped aboard the ever-popular paint-chip-art train? What? You haven't robbed your local hardware store of all the season's colors in the name of crafting? Get on it. Barb has been planning this project for a while, and we just got around to completing it yesterday. I use the term "we" loosely. I glued and she pretty much did the rest. This little piece of art began as an ugly thrift store find, and is now a pretty paint chip frame to hang in her craft room. Here are the details:

    Materials:
    -thrifted canvas, wood painting, or other base of your choice
    -stolen paint chips
    -spray adhesive
    -antiquing medium
    -chipboard letters
    -spray paint
    -E6000 adhesive


    Here's the starting point: a delightful fruit basket complete with flowers. Because who doesn't mix a little baby's breath in with their fresh produce?
    Adhere the paint chips to your surface. We used an antiquing from Hobby Lobby after this, but didn't photograph it.
    Arrange your chip board letters on the back piece. We spray painted ours white so they would really pop out when hanging on the wall. Use E6000 or another adhesive to get your letters to stay on .
    If you're checking out that backwards "t", it was intentional. Geez, think outside the box, wouldya?

    In other news, my two-year old is obsessed with buses. Like, they seem to consume his every thought, won't go to bed without one kind of deal. Guess it's healthier than my obsession with chocolate chip cookies. I let him watch youtube videos of the "Wheels on the Bus" videos on half my screen while I'm on the computer. This one is my favorite.


    Saturday, March 10, 2012

    New Projects

    Here is one of the many projects I've been putting together. This one took an especially long time, but was totally worth it.
    Baby boy #2 has been a joy thus far. Of course I am getting much less sleep and accomplishing fewer tasks, but am managing to squeeze in plenty of snuggle time and an extraordinary amount of nursing. This kid likes to eat. I'm going to be on the lookout for a onesie with a reference to how much milk this one drinks.

    Aside from snuggling and playing cars with my two-year old, I have had a chance to create a few fun things around the house. Now that I am acclimated to my new little family, I hope to share all my fun projects with you very soon.

    Tuesday, January 31, 2012

    Magnetic Calendar

    Sharing with you today the magnetic year-round calendar I crafted up. I had to post on the last day of January, mostly because my pregnancy goal was to make it until at least February. My due date is twenty days away, but each day I show up at work people look astonished to see me...same with my doctor's appointments. Yes, still cruising around with the baby bump. And loving every minute (and day of January).
    My mom found the magnetic board at a craft store, but had she not, I was going to use a sheet of steel and vinyl or sharpie the calendar template on. For the date stickers, I did the following:
    1. Printed off numbers 1-31
    2. Printed off enough letters to spell every month (If you want a copy, comment below and I can email you the document).
    3. Made the letters/numbers into stickers with a Xyron sticker maker, stuck them onto small squares of cardstock.
    4. Mod-Podged the cardstock onto square tiles.
    5. Used E-6000 to adhere a "rare earth" magnet (very strong hold, tiny magnet) on the back of each one.
    I wasn't going for perfection here...I like the numbers a little off-kilter. It suits our style. I found some cupcake buttons I'm going to use in place of a number when it's someone's birthday, and will hopefully find some more themed buttons as well for other holidays.

    Friday, January 27, 2012

    Menu Planning & Free Download

    I have been busy with lots of projects. Photographing and posting to this blog, however? Well, I'm slacking in that department. Now that I've got a backlog of creations, I better get to sharing.

    This one is less of a creation of mine, and more of an organization tip/free printable. I've been using a menu planner for the last three weeks, and love it. I've always had a general plan of what I want to make for the week, but writing it down and planning it out helps me actually stick to the plan instead of throwing a frozen pizza into the oven.


    I found two different patterns at 733 Blog. They are both free for download. You can make them into a book, but I just printed mine and keep them hung on the side of the refrigerator. I also love the grocery list on the side you can cut off. Head over there and check it out. There are tons of other great things to explore while you're there.

    Have a great day,
    Robin

    Monday, January 2, 2012

    Back From Break

    Where have I been? Absent from here, that's for sure. I have been on "Winter Break" from school for just over a week, and have enjoyed every minute of it. I couldn't get myself motivated to blog on these days--lacking motivation in that department. New Year's Resolution? Ha, yeah right. I have an early January birthday, so have learned to never set myself up for failure like that. I can't wait to share what I've been up to over break, and maybe you'll gather some inspiration, ideas, or links to use. Caution: complete randomness ahead.

    1.) First, I read a couple good books:

    Set in South Africa during the Apartheid, the story of a young boy who encounters many interesting characters while coming of age, facing racism, and recognizing the power one possesses.
    Way better than I expected. The story is not focused just on race, but on the adventures of this interesting and inspiring family.


    2.) Then did some intense research on photography. I used these sites:

    Pioneer Woman Photography has some great explanations and tips. She claims not to be an expert, but her pictures show otherwise.

    Two Peas in a Bucket has a downloadable 12 week course that you can reference or print in PDF form. I love the format and have printed out the first couple weeks to try.

    Turns out I'm still not that awesome of a photographer. But I'm working on it!
    3.) We celebrated Christmas with family, and I spent lots of time with this special little man.


    4.) Stocked up the deep freezer for maternity leave.

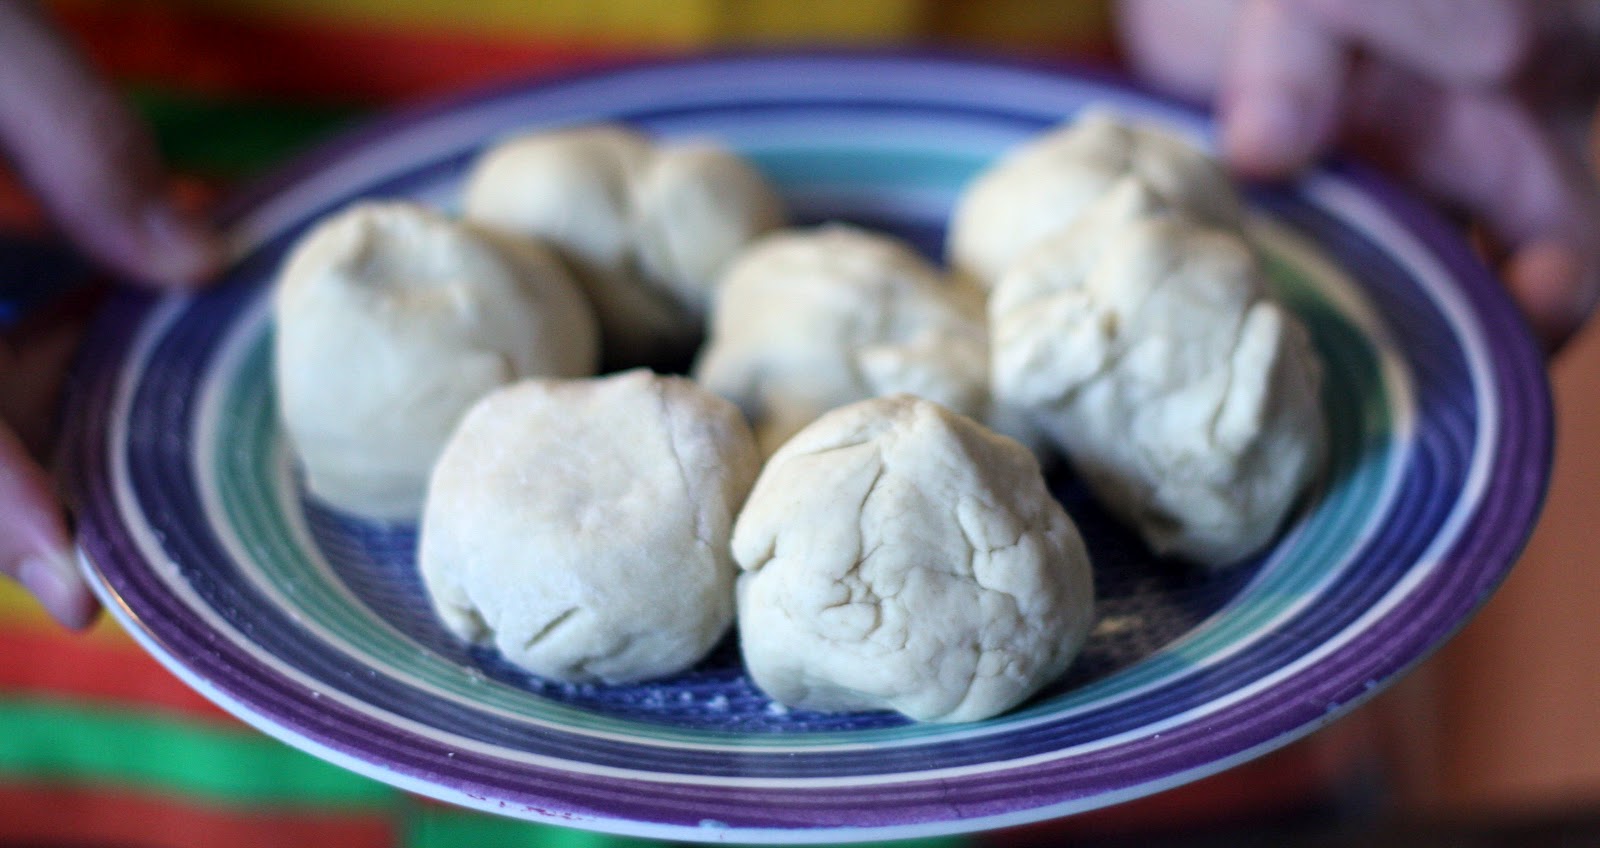
    I found recipes and information on this LiveJournal. I was able to make and freeze almost 20 meals in about 4 hours (spread over two days, let's be real, I'm hugely prego and slow moving) and it cost less than $150. The food looked so good I kept wanting to eat one of them that day. Didn't give in, only because the husband was there and I didn't want to look weak.

    The pic above is from the livejournal and looks a lot neater than my kitchen did at any point of preparation.

    5. Prepared for baby number two

    Eek! Holy nesting session. Busted out all the gear for baby, and have the car seat all set to go. That's right, sitting out in the open, ready for me to grab at a moment's notice. Because that's totally how childbirth goes--one minute you're in labor, the next you have a baby. At least I feel prepared. What is that called when you can recognize the "crazy" but don't do anything about it? Oh yeah, pregnancy.

    6. Pinned a "few" things.

    Dare you to stop by Pinterest for just a few minutes. I have found the site incredibly helpful. When I'm feeling crafty, I hit up Pinterest and get to crafting (usually).

    7.) Organized and backed up months of photos

    So this doesn't really seem like a task I should blog about, but it took so freaking long that I feel justified listing it. I need all my picture folders meticulously organized, which is painful. Someday I will be thankful for this. Also, take this as a friendly reminder to back up your pictures and documents :)


    I hope you gathered at least one idea by reading today! I am blessed to have had such a long break from school as well as a toddler who takes long naps. Have a great day.