Thursday, March 31, 2011

Good Food Friday

Let me introduce you to the most delicious cupcake I've ever tasted. And I've tasted a few cupcakes in my days. This is not for the faint of heart, nor is it for dieters. This is a cupcake for the most important of celebrations. Like the fact that it's Friday.


It's a cupcake, with cookie dough inside. That's right--a cupcake and cookie in one. I made these for Button Boy's first birthday party, and they were a hit. The key is to make sure the cookie dough is good and frozen before you bake. The recipe calls for homemade cookie dough and a boxed cake mix, but if you're short on time or motivation, you could use pre-made cookie dough. I've also discovered there is a brownie batter cupcake that takes a close second, but am holding out for a legitimate excuse for making those.

What I actually wanted to post was one of my main course recipes, but I didn't have any pics, and I didn't want to leave you hanging without any visuals. I have tons to share, and an overly stuffed recipe book to prove it.

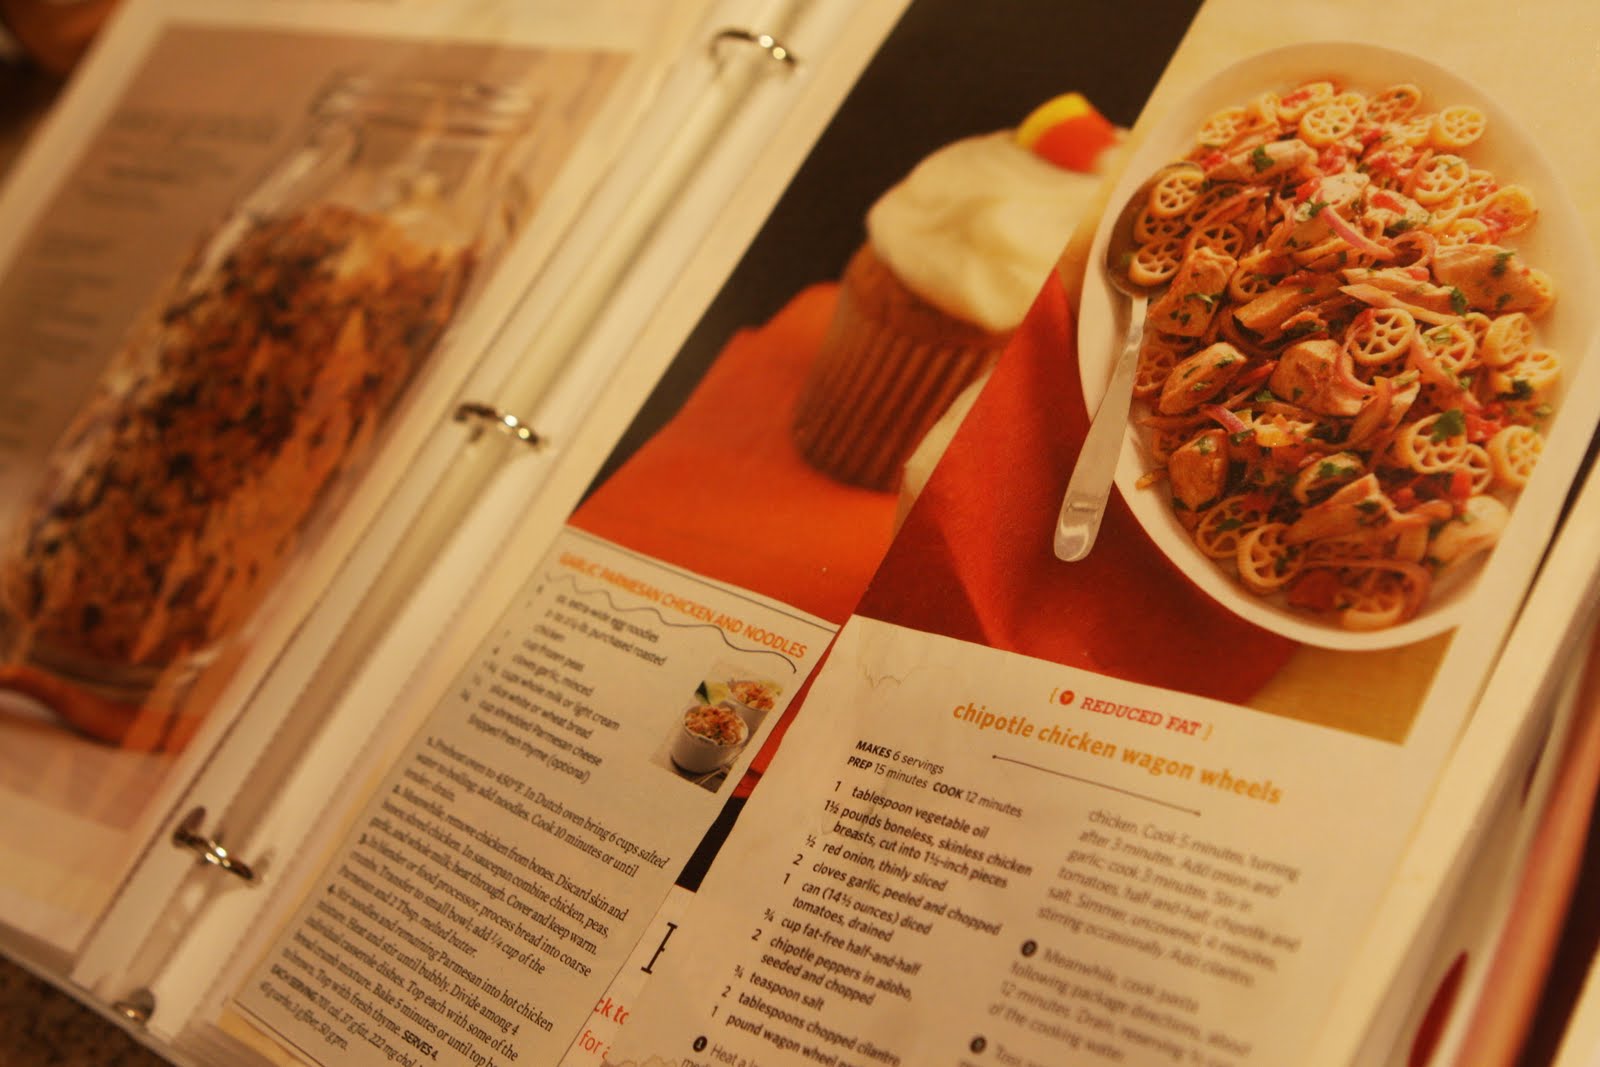
It hasn't become second nature for me to photograph food while I cook. My cooking style, though becoming more refined by the day, is more like a science experiment. I never know what the end result will be, but I have a pretty good hypothesis. And so it is with my picture taking. Unknown results, but here I have many chances to get it right. I shall continue with my mediocrity in both to share some good eats with you here on our humble blog. Mama Pear has some classics as well. Until then, feel free to drool over the cupcake image...unless you have a laptop. That's not safe. Much love from The Sweetest Pear.

Wednesday, March 30, 2011

T-Shirt Scarf

Scarves are my go-to accessory these days. They're easy and keep me warm on chilly Spring mornings. Or afternoons, or evenings. This is SD after all. I saw a few tutorials on DIY Dish and couldn't wait to make a few. My first attempt, a former long sleeved purple tee, made its way to Des Moines with my good friend. I tried a pink one recently and love how it turned out. I will post my directions here, or you can head on over to the link above.

1. You'll need: A t-shirt, mostly plain. It can be jersey knit, cotton, or have some spandex. You'll also need fabric glue, a scissors, and a round object, such as a plate (approx. 8 inches).
2. Cut as many circles as you can out of the fabric. It's not important to be precise.
3. Starting at the outside of each circle, cut into a spiral. I made each cut so there was 2 inches between.
4. Stretch out the spiral, holding one edge in each hand. It will begin to look ruffly.


5. Glue two of the strips together with fabric glue. Continue until all are glued.

6. Gather the strips loosely. Using a scrap piece of fabric, tie around the center of the scarf so strips stay together and the glued portions are hidden.

7. Wear proudly. I am thinking of dressing mine up with a brooch or flower or something. For now, the brightness screams Spring. Enjoy!

Monday, March 28, 2011

Small Town Tech


If I had an online dating profile it might read "High energy, creative homebody with a love for the outdoors seeks..." better not go there. I've sought and found. A great one. A technologically advanced one that keeps me on my toes when it comes to technology. If I got a problem, yo he'll solve it. If anyone relatively close to me has a problem, he'll solve that too. I guess what I'm trying to say, amidst meandering rambles about my personality and Vanilla Ice references, is that I am a technology junkie, amongst other things, and fully intend to share any bits of knowledge I can garnish from my spouse or the hundreds of blogs I read.


In an effort to provide you with some consistency, I'm going to try to make this a regular Tuesday trend. If you hate it, please comment below, and I will reconsider. I just enabled my comments to open in a pop-up window, thus making it much more user friendly. Nifty, huh? That's where the junkie part comes in handy. Yes, new technology, the Internet, Facebook, this blog can take a little time out of your day. It can also enhance your days. Think of the many smiles and smirks you've already enjoyed by reading this post. No, but really, there are some amazing tools, sites, and more that can make your life less complicated. Or more fun. Or both. Do you use the computer late in the evening and feel like the screen is giving off an eerie blue glow? Did that sound like an infomercial introduction? Yes. Anyway, I couldn't handle the bright screen at night, so I downloaded f.lux. My computer screen is now "warm" and not so harsh, so I can blog to you each evening without accosting my eyes and losing sleep. It's an easy download--just go to the site and select the operating system you use and it does the rest.

Now let's talk food. Recipes to make food, that is.

A Facebook friend turned me on to Google Recipe search. It's amazing, and you don't have to install anything on your computer. And it's free. Here's what you do. Google search whatever it is you may be craving. You don't have to be specific. You can do "shrimp pasta recipe" or "fruit appetizer recipe" or whatever you have in mind. Then, in the left panel, click on Google's "Recipes" tab. I don't know if it's a tab or link or tool. It has a little icon, so I just click on the word.


Google will pull up some links with pictures and ratings. Here's the best part. On the left panel, you can focus your search by checking which ingredients you want or don't want, or only search recipes with a certain cook time or caloric value. What an efficient way to find a recipe for ingredients you already have. My days of magazine scouring are over. Maybe.

Before I leave you, let me give you one last link. It has nothing to do with crafts or cooking, but it could. Head over to fiverr.com. People are promoting their services and sharing their talents for five bucks. There are some outrageous ones, but it's worth looking. I am going to try it this week, but can't disclose what yet. I'll keep you posted.


Sunday, March 27, 2011

Paper Addiction and a Redo

Barb, aka Mama Pear, has some confessions of her own to make. They don't involve polka dots or metal, but don't think she's any better than me. Oh no, this one is much more dangerous in the craft aisle. Who are we kidding? She doesn't need an aisle. She'll take a hobby store, thrift store, a bargain bin or something she already has and make it beautiful in no time.

We shall now hear from Barb. From this point blogward, Barb's posts will be in red, which happens to be her favorite color. This way you can better visualize who is blogging at you. Pictures to follow of both of us, so you can have a visual to visualize.

Guilty, that's me. I love scrapbook paper! If it's on sale you'll probably find some in my shopping cart. I have lots of options on hand at all times and can usually find something for my current project.

I also like to find "stuff" that I can alter--fast forward to my new canvases.

I was shopping in the Christmas clearance section at our local Alco store and found Christmas themed canvases for 70% off. I grabbed all of them thinking that I could do something to alter them. To make them, I first painted the sides black with craft paint. I used Mod Podge to glue the paper onto the canvas. In picking out the papers, I tried to go with heavier paper. If you choose thin paper, it's more likely to wrinkle when gluing it on.

Last, I inked the edge. To ink, rub a stamp pad gently along where the paper meets the black paint and voila! Re-purposed canvas art to adorn my wall.
This is a simple alteration, but is lots of fun. You can use canvases of any size, or mix and match like seen here.

Saturday, March 26, 2011

A Track to Enjoy


I stumbled upon this Mindy Gledhill video while "getting lost" on the Internet one weekend. "Getting lost" is the phrase we use at my house when one of us zones out on the computer screen for an exorbitant amount of time. This video proves that sometimes, getting lost can be a good thing.


My musical taste is all over the map. I love all types and styles, and finding a new artist is always a joy for me. I especially enjoy finding the ones that aren't mainstream yet, or maybe never will be. Helps me feel sophisticated....or maybe a little chic. It gives me something to enjoy while I use the computer anyway.

Now that you're relaxed and enjoying the new tune, let me get serious. Not serious, just sentimental. I think my heart-not the organ, the metaphorical heart, grew by three sizes tonight. I was snuggling my little guy (who we'll refer to as Button Boy from here on out) before bedtime. I looked down at him to check the status of the eyes--open, closed, or drowsy. They were drowsy, very drowsy.

So I gulped down the metaphorical lump in my throat to keep from bursting with love, gave him a smile, and he returned the look. The kid was seconds from sleeping, and gave me the sweetest smile ever. Of course this is not a smile I could have captured with a camera. I couldn't--no lighting, full hands, and it was bedtime. I had to tell you about it, not only because you already know a ridiculous amount of information about me, but to catalog this into my memory bank. It was sort of one of those "aha" moments, except without any logical conclusions. Just that I love being a mom. So, in honor of my cheesy, mommy-love, gooey post, enjoy some pictures of the button boy. Because what's a post without pics?

Friday, March 25, 2011

Blogging Lessons


We are nearing the end of our first week of blogging! I knew we were going to have to start small, and we sure have. I think we are now up to 11 trusty followers. Woohoo! No sarcasm intended. Eleven makes me ecstatic.

I am constantly dreaming of ideas, photos, and experiences that I must share with you, and believe me, I've got a lot in store! So, to commemorate our first week on "The Sweetest Pear," I have put together a short list of what I've learned thus far:

1. It's not easy to be witty and self-assured all the time.
This comes and goes for me. Some days I feel like I'm funny and entertaining and other days not so much. I will hopefully find my groove to ensure that you keep reading. Mama Pear is getting all geared up to start posting as well....we all have that to look forward to.

2. Every day can be remarkable.
Knowing that I must have material to blog about has forced me to take note of the remarkable moments that pass each day.

3. Blogging is more than just posting ideas and pictures.

Connecting with friends, followers, and other bloggers is just the start. I am dragging Mama Pear down a path of unknown technology and social networking. Buckle up, it's gonna be a fun ride.

4. I appreciate every time you stop by and read.
I'm not sure how this picture relates. It looks warm; the way I feel when I think about how YOU are taking time to read our posts each day.

Now that I think of it, it was really muggy this day. Late August, high humidity, mosquito ridden. That's not warm and fuzzy, that's uncomfortable. We might have a few of those moments too--the uncomfortable ones, so it's better we start bringing these things up now. In all seriousness though, thanks for reading. We appreciate every time you stop by and all the friends you've shared our link with.

Thanks for reading! See you on Monday!

Thursday, March 24, 2011

Heavy Metal

We have a large wall in our house, which spans the length of the dining and living rooms. At its peak, it reaches near 14 ft. This is my husband's estimate. I said 10. Anyway, it's big. When we moved in, it was painted sage green, as was the kitchen. I am a green kind of a girl, but not the kind of green on my giant wall. So what's a homeowner to do?

Paint, of course. I thought about many colors and taped up numerous paint samples, but I could not get the color of my previous living room (a deep brown I was in love with) out of my head. After much deliberation, the wall is now a dark brown. Sounds like it would be dark and looming on a giant wall, but it's surprisingly not. It's warm without being overwhelming. Reminds me of chocolate....mmmm.


This big ole' brown wall has been begging for some decoration, but nothing I've found has been quite right. I wanted something big and statement-making that didn't cost a ton. On one of our trips to Pier 1, I spotted this big metal beauty. Along with polka dots and recipes, I have a thing for metal. All types, especially hammered metal or painted types. I eyed it that night, took a picture and sent it to Barb, then kept thinking about it for a week or two. Eventually my husband got tired of hearing me talk about the metal flower and we returned to Pier 1 and purchased it.


It's currently hanging in the middle of the beastly wall, about a foot from the ceiling. I would not normally hang something so high, but the height helps to separate the spaces and adds some visual interest up high, making our room look bigger. It cost $80 and is worth every penny. I love that it's dimensional and the pop of red keeps it fun. I can't wait to adorn the rest of the wall with some fun pieces.

I've got my eye on a few other Imports from Pier 1 as well. When they go on sale, of course.

Now for a snapshot of the beautiful baby. If you're not into pictures of babies, you can stop reading here. Are you kidding me? Who doesn't like a picture of an adorable child? You obviously do if you're still reading. I know I do. This is the handiwork of my handsome husband--the good looks run in the family. He's a much better photog than I am but claims he lacks skill. I disagree.


How can you not love that face?


Wednesday, March 23, 2011

DIY Canvas Art

I promise this blog will not be all polka dots. Or all pears. Or all of any one thing. Please expect a cheery and aesthetically pleasing variety of gems. But today, I give you polka dots, errr....circles.


Mine is done in bright colors for a child's room, but you could make it more sophisticated or a different design by altering the color scheme. If I made another, I would do a red/turquoise/gray theme with maybe a muted yellow or orange. I'm not sure I need two though.

This project is super simple, and produces a finished product in no time. This is great for those of us who have an attention deficit....i.e. me. Barb helped me out with the logistics on this one, and it turned out great. .


You'll need:
-a canvas (any size will work)
-craft paints
-embroidery hoops of various sizes. They come in a set of two, one a complete circle, one that has a little bracket w/screw attached. We used just the complete circles.
-Aleene's tacky glue
-spray-on clear lacquer. This can be found at any hardware or craft store

1. Paint your canvas a desired color. My friend Megan taught me this trick: Paint a coat of one solid color, then use that same color and mix it with a little black or white (y'all took art class, so get to mixing) on your palette. I use a plastic plate...classy, I know. Then for your second coat, spread your mixed color lightly over the top of your first coat. You don't have to cover it completely, but just cover up any white. This helps to mask imperfections and keeps it looking dimensional.
2. Lay out your hoops and decide which order you'd like them in, and decide what colors you'd like for each hoop, then paint each one. I'm telling you to do this step because it seems like a well-thought out process with good planning. This is something Barb would suggest, with just cause. I of course did not do that process. My project turned out alright. You decide for yourself.
3. Glue your hoops on with tacky glue. Let sit overnight. After 12 hours, spray with clear coat in a well ventilated area. Hang and enjoy.


Tuesday, March 22, 2011

Mama Pear

Stamp from Sweet Paperie's etsy shop

Meet Mama Pear, the creative and highly motivated "other half" of the sweetest pear. Some call her Barb. I refer to her as Mom. Unless we're in a store with a number of women, because it's awkward even in your 20's when you say "Mom" and someone else answers. On with the intro.


Barb is the definition of a crafter. She's been creating and sharing her talents for decades, and is always thinking of how she can use her gifts to brighten the lives of others. Her medium of choice is usually paper, but she is quick with a needle, swift with a hot glue gun, and nimble with a sewing machine.

I'd like to say I inherited a smidge of her craftiness, but she is much more focused than I am. She is a "doer," always getting things done. It may be her Scandinavian genes, or just the joy of a finished product. Whatever it is, it's remarkable. She has a card for every occasion, and no holiday passes by without Barb showing she cares with a thoughtful gift (usually homemade).

On top of all this creativity, she is sweet as can be. In fact, the blog title fits her perfectly. Not that she's pear shaped. Or is that a good thing now? I can't keep track. I think skinny is still in. Which means I'm out. Either way, my mom is SWEET. I can prove it. Check out the card she made to celebrate our new blog:


Card is an original "Mama Pear" design, using Cricut's "Preserves" cartridge


We will get a picture of Mama Pear up soon. She is a hard one to capture on film. Until then, you can adore my son, who fell asleep in his high chair. While I ate jelly beans. For dinner. Don't judge....we've had a long day. At least I captured these tender moments.

Poor guy. Had a little run in with some peanut butter. We won't try that again.

Note: PB did not cause him to sleep. No connection. Except that after itching his lil face a bunch and screaming, he was tired.

Monday, March 21, 2011

Try This on Tuesday!


I found this recipe in a Better Homes and Gardens magazine a while back for "Sweet Bacon and Pear Pizza."


Wait, I better tell you now about my recipe obsession. I hunt recipes. Some people hunt wildlife, or hunt for a bargain. I scour magazines, newspapers, other people's recipe boxes, and the Internet for recipes. Not just ordinary recipes, but the non-conventional recipes, ones that use more than ground beef and noodles. Don't get me wrong, I can whip up a mean casserole with those two ingredients and a few spices. I just prefer the ones that make me husband raise an eyebrow as he takes a cautionary first bite. And so it is with the bacon and pear pizza. Not too outlandish for our kitchen, but unique just the same. It can be made for an appetizer or eaten as a meal. Plus, pears are one of the ingredients.

My recipe book, which I'll post about later, is a smattering of once-prepared dishes, desserts, and drinks. I usually can't bring myself to make the same thing twice, as I have so many recipes we've yet to try, but this one, I've prepared three times. It's that good. If you are looking for an app to bring to book club or a light dinner to wow your family, put down the ground beef and give it a try.

Here is the recipe for you cautious clickers:

Ingredients:
-nonstick cooking spray
-5 slices bacon
-1/4 cup brown sugar
-1/4 tsp. chili powder
-1 pear, cored and sliced
-1 tsp. lemon juice
-1/2 an 8-oz. tub cream cheese
-1/4 cup chopped green onions
-1 12 in thin pizza crust
-1/3 cup chopped pecans
-1/3 cup crumbled feta cheese
-1/4 cup fresh basil and honey (optional)

1. Preheat oven to 400° F. Line bottom of rimmed baking pan with foil and spray with cooking spray. Arrange bacon slices on pan; set aside. In small bowl stir together brown sugar and chili powder. Generously sprinkle brown sugar mixture on bacon slices. Bake for 15 minutes or until browned; remove and set aside. Increase oven temperature to 450 F.
2. In small bowl toss together pear slices and lemon juice; set aside. In medium bowl stir together cream cheese, onions, and black pepper to taste. Place pizza crust on clean baking sheet Spread cream cheese mixture on crust. Chop bacon and evenly sprinkle on cheese mixture. Arrange pear slices on bacon. Top with pecans and feta cheese.
3. Bake for 12 to 14 minutes or until cheese begins to brown. Sprinkle with basil and pass honey for drizzling. (We skipped this step.... it looked so good we couldn't be bothered to garnish)

-Original recipe by Lynda Cameron-Bayer


A Welcome Sign


Bridger attended a birthday party on Sunday, where he was all smiles and giggles. He must have used up all his positive energy on the relatives, because he had nothing but scowls for us.


Here is our new entryway rug. Polka dots are quite possibly the most welcoming sight upon entering someone's house, right? Well in my house that's true. I have a few dots scattered throughout, but am working on "editing" my choices as to not go overboard. I thought this one, which we purchased at Target, was still mature looking. I have visions of a bench on the right side of the entryway, where guests can sit while they take off their shoes. More to come on that....it's in the works.


You now know all about my polka dot obsession. Surely you have your own decorating "polka dot." What is it? I'd love to know.