Sunday, April 17, 2011

When a sheet cake just won't do.


We hosted a birthday party this weekend with friends, and I was in charge of dessert. I have been eying a sweet treat each time I set foot in Starbucks, and dying to try to make them. Cake pops-- it's cake on a stick, made famous by Bakerella. Here are some pictures and directions to make your own cake pops for the next special occasion, when a sheet cake just won't do.


What you'll need to make 18 cake pops:
  • 18 oz. boxed cake mix (flavor of choice)
  • 1/2 cup creamy frosting
  • 14 oz. bag candy melts (found mine at Michaels craft store)
  • lollipop sticks (also found at craft store)
  • sprinkles or other decorations
Directions:
1. Bake the cake as directed on box or per recipe.
2. Once cake is cooled, crumble half of it up (freeze other half for next time) in a large bowl with your hands until no large pieces remain
3. Stir in frosting and mix until combined.

4. Use a cookie scoop to make each cake ball approx. the same size and then roll into a ball between your hands. Place on wax paper in the freezer.

5. Freeze until cake balls are no longer sticky, but not rock hard, about an hour.
6. Melt a few candy melts in the microwave for about 20 seconds. Remove and stir. Dip the lollipop stick into melted candy and then stick into cake ball. Return to freezer for another hour.

7.Remove cake balls from freezer. They should be firm.
8. Warm candy melts according to package directions, stirring often.

9. Coat entire cake pop with candy coating and decorate immediately. This part needs to go quick or the decorations won't stick.

10.Store upright using styrofoam or other contraption until coating is hardened. Enjoy with friends.




Today's Creative Blog
Funky Polkadot Giraffe
Running With Glitter
Not Just a Housewife
Blue Cricket Design
Sugar and Dots
Tea Rose Home
EisyMorgan


Somewhat Simple
Katie's Nesting Spot
What Allie's Making Now
Fireflies and Jellybeans
The Shabby Chic Cottage
Gluesticks
While He Was Napping
Whipperberry
Simple Home Life
Fingerprints on the Fridge
Fun to Craft
Naturally Me Creations
Juice Box Dreams

Thursday, April 14, 2011

Stir Fryday

To make up for my last two high-calorie recipes, I thought I'd share one that is on the healthier side. We try to stick to a low fat, high fiber, full of veggies and fruits kind of eating style around here. But then life happens and someone has a birthday or an anniversary or a craving. We might lose focus in the presence of cupcakes or dark chocolate, but we regain strength at meal time, and cook something with less than 300 calories, like this:


Pork Stir Fry with Garlic (I'm going to try this with chicken, too.)

Ingredients:
  • 3 cups broccoli, chopped into one inch pieces
  • 3/4 cup reduced sodium chicken broth
  • 1/2 cup chopped scallions (fancy term for green onions)
  • 2 Tbsp. minced garlic
  • 2 tsp. olive oil
  • 1 cup chopped onion
  • 1 red bell pepper, chopped
  • 1 lb boneless pork tenderloin, cut into 1/2" by 2" strips
  • 1 Tbsp reduced sodium soy sauce
  • 1 Tbsp. toasted sesame seeds
  • 2 Tbsp. chopped ginger. ( I used the ground ginger from the spice aisle....half the amount)

1. Steam broccoli about 2 minutes until bright green. Drain and rinse with cold water to stop cooking.
2. Combine 1/4 cup broth with scallions, garlic, and ginger in food processor/blender and pulse until mixture is finely chopped.
3. Heat 1 tsp. of the oil in a large skillet or wok over med. high heat. Add onions and bell peppers. Saute 5 minutes or until vegetables are tender. Transfer to a bowl and cover to retain heat.
4. Add remaining oil to pan over med. high heat. Add scallion mixture and saute 1 minute, stirring constantly. Add pork and soy sauce and saute 4 minutes or until pork is nearly cooked. Add remaining broth and bring to a boil.
5. Add broccoli to pan and stir until cooked through, about 3 minutes. Add onions and peppers back to pan.
6. Divide between plates and sprinkle with sesame seeds.

Wednesday, April 13, 2011

Take a Look....It's in a Book


I am a teacher, so naturally I'm an advocate for reading. I read all the time: blogs, magazines, and picture books. These count as reading! Trust me, I'm a teacher-- I know these things. I read real grown-up books too, just not as much as I'd like.

To pass on the love for reading and the patterns of speech, we have been reading to Button Boy nearly every day since his birth. At first he didn't notice what was happening, and this was fun. He was an excellent listener, and we felt like awesome parents, exposing our wee one to literature so early in life. As the months went by, he became less interested. When I say less interested, I mean let's chew on the board book until the pages are dilapidated and have expanded to three times their normal size. Or how about we turn this into a fun game of "drop the book on the floor, look surprised, then in the cutest voice possible say 'uh-oh.'" Needless to say, he wasn't an avid reader.

Until now! We have now turned to a new chapter in his reading adventures. Pardon the pun, I couldn't resist. My son now enjoys books! Mostly just the ones where you get to touch different textures, but a book nonetheless.

We are reaching lots of fun milestones as he ages, and this one is exciting for us. We may just put away the singing frog now that we have a new hobby.

Tuesday, April 12, 2011

Rosettes: How and Why

Everywhere I look in blogland I find rosettes. I see em on jewelry, on walls, on art, thrown together in bowls, on t-shirts, pinned on to scarves. You name it, it can have a rosette on it.

I'm not one to often follow trends. Not because I don't want to be trendy or fashionable, but mostly because I am too cheap frugal and lazy busy to keep up on these things. Rosettes, however, I can totally do. Mostly because Mama Pear showed me the ropes. Plus, there are tons of tutorials out there, as well as lots of ideas for inspiration.

Because I told you it'd be coming, here is my quick tutorial for making a fabric rosette:
What you need:
  • 1.5 to 3 inch wide strip of material. The strip should be around 24 inches or more.
  • scissors
  • hot glue gun with glue
  • embellishments, such as buttons and ribbons

1. Create long strips of fabric, using the dimensions listed above.

2. Fold the fabric strip in half the long way, so it is about 1 inch wide (depending on starting size)
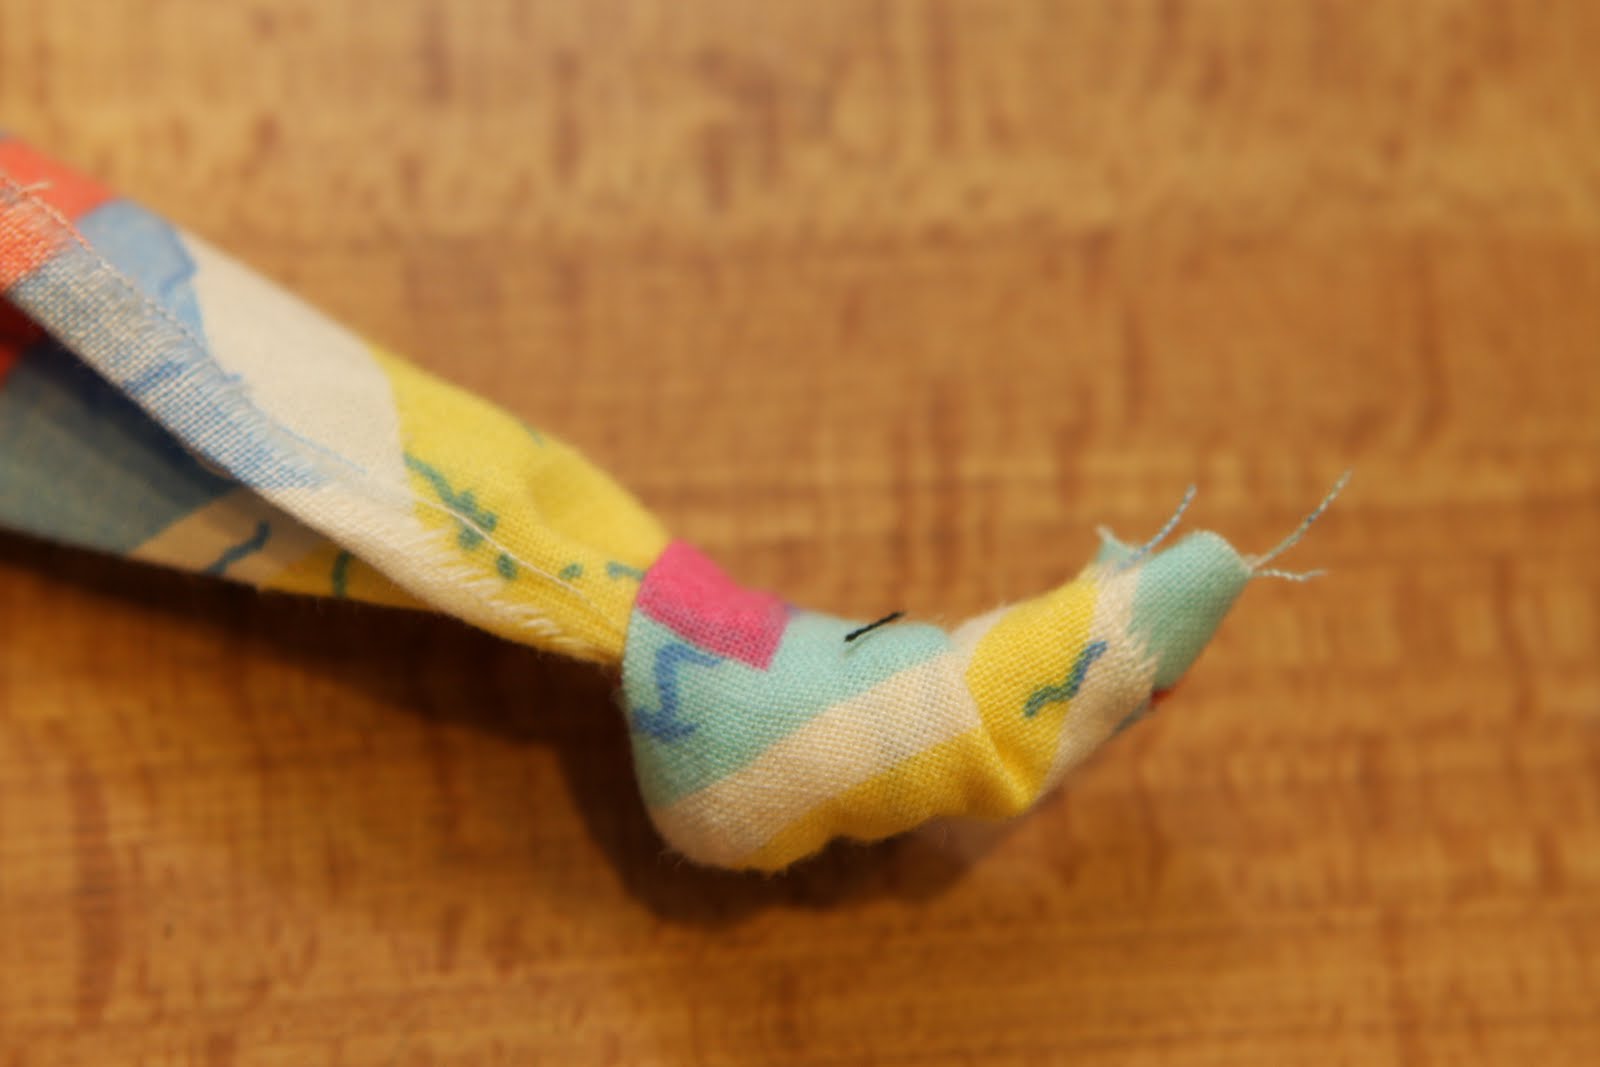
3. Tie a small knot at one end of the fabric.

4. Twist the loose end of the fabric slightly and begin wrapping it around the knot. Hot glue to hold together as you form the flower.

5. Continue twisting the fabric and gluing until it reaches your desired size.

6. Cut fabric and secure with hot glue to the back side.
7. Embellish and add to your favorite project.

The best part is you can use fabric you already have on hand. Sort of a stash-buster craft project. Here are some other rosette ideas to help you get your roll on.


Natsprat has an eye for rosettes. I am in love with the bold colors, and plan to try this wreath!
Nichelle from Vintage Wanna Bee embellished these shoes. Delightful, huh? I think so.

Cami from You Seriously Made That? has a fabulous tutorial for rosette hair accessories. Head over there.

Don't see something you love, but like the idea? Google it, and enjoy the rosette ride of your life. There are innumerable options for their use and just as many ways to create them. Enjoy!

Monday, April 11, 2011

Tech Tip Tues: Noise Edition

I don't need another reason to "get lost" on the Internet, but you give me a reason to, each and every day. That's just an excuse... I'd do it any way. On the upside, you get to benefit from my online excursions. In this edition of "Tech Tips," I'll focus on noise--all kinds of it. I'll point you to some sites that I've scoped out and maybe there will be something you like. I sure hope so.

The first noise we'll explore is music. One of the most pleasant type, in my opinion.

Ever feel like you want to curl up with a soft friend and listen to some tunes? You don't have to snuggle with glow-worm (circa 1985) to do this. All you must do is head over to Stereomood.com. You can select your mood and it will play music to suit your fancy. Or emotion. Or even possibly desired emotion. I selected sleepy and it's working. I'm going back to try the "jogging" playlist. I'll let you know how it works out.

The next one seemed strange to me at first, but I get it for those of you who work around a lot of people. I think I need this for breakfast time. I struggle with cereal chewing noise. It's called SimplyNoise. You can select white, pink, or brown noise to cancel out the sound of your coworker clipping her nails, or use it to focus while studying.
Maybe you'd rather dream of a spring rain while your cubicle neighbor slurps his coffee. If so, RainyMood might be just the tab to have open. It plays the sound of a gentle rainstorm while you get your work done. Or blog.

My last Internet music obsession is GrooveShark. I have not used it intensely enough to access all the features, but fully intend to do so. You can select a genre you like, then it will play those tunes for you. If you don't like one, click on the sad face. If you do, then you can happy face the tune or add it to a playlist or your favorites.

You're jammin' now, aren't you? At least some white noise? I'm back on sleepy music. The jogging music didn't fit the bill. Have an awesome day and thanks for reading!

Lots of love,
Robin

Sunday, April 10, 2011

Barb's Magnet Board

Welcome back to my hideout! This is where my crafty creations begin and end. My craft room is painted a cheery yellow with green print curtains from the Debbie Mum line. You'll find my creations throughout the room, as well as ideas for inspiration.

What I want to highlight is my new magnetic board that my husband helped me hang. I had seen something something similar in cyberspace and thought it was a great idea. We had the metal on hand in my husband's shop, so all we had to do was attach it to the wall with screws.

To make the board more functional, I covered tin cans with scrapbook paper, ribbons, and stickers. To keep them in place, I hot glued three magnets to the back of each. These keep all my gadgets easy to reach but out of my way when crafting.

The hanging hooks are from Walmart, and again I attached some strong magnets. These hooks are perfect for scissors and tape. I always have a notepad hanging to jot down supplies to shop for or random thoughts while crafting.

I created the large rock magnets for Christmas gifts and thought I needed a few. To make, I used clear stones and ModPodged paper/stickers on to the back. Again, hot glue a magnet. Thanks for visiting my corner of craftiness!

Saturday, April 9, 2011

T-Shirt Tutorial #2--even better!

I met with a friend for coffee today, and guess what she was wearing? A t-shirt ruffle scarf, seen featured here! So now it is on to t-shirt up-cycle number two. This one takes a little bit more time and a few more supplies, but is not tough. I present to you, the T-Shirt turned Reusable Bag, Sweetest Pear Style.
We have lots of reusable bags, but none this cute until now. My inspiration came from this blog, but we had to fancy it up a bit. Below you'll find a tutorial:

Supplies:
  • t-shirt (We used adult size XL)
  • scissors
  • sewing machine with matching thread

Rosettes/Weaving:
  • scraps of cotton fabric
  • hot glue gun & glue
  • buttons
  • ribbon

1. Begin by straightening out your t-shirt. Iron if it's very wrinkly. Then, fold your shirt in half so the sleeves are lined up.
2. Cut around the sleeves as is shown in picture 2.
3. Cut around the neck as shown in picture 3. At this point, your t-shirt will look like a tanktop.
4. Sew across the bottom of the shirt while it's right side out. Then flip the shirt (now a bag) inside out and sew across the bottom again. The second seam you sew is going to be above the first. Something about a french seam...
5. Now to make the bottom boxy. While still inside out, make a triangle like in picture 5. Sew across (perpendicular to the seam) to make the stitch the base of the triangle.

At this point, you can turn it right side out and see that you've made a bag. But if you want some additional style points, continue with these steps:

6. Create rosettes from cotton fabric. Don't know how? No worries, that's our next post!
7. Hot glue some ribbon leaves onto the back and a button center onto the front, then adhere to the bag with hot glue.
8. To make slits in the bag, fold over and make small slits (1/4to 1/2 inch) about an inch and a half apart. You can make as many or few rows as you'd like.
9. Using a long scrap of cotton, weave through the slits and tie, knot, or hot glue to hold the weaving in place.


Here is a shot without the weaved strips, in case you're looking for a simpler style:


This project linked up at:
I Heart Naptime
Perfectly Prim Party at the Prairie Patch
Naturally Me Creations
The Saturday Mornings Blog
Petite Hermine
Simple Home Life
Fireflies and Jellybeans
UndertheTableandDreaming
Katie's Nesting Spot
Party Button

Juice Box Dreams