Showing posts with label sewing. Show all posts

Wednesday, December 21, 2011

Last Minute Christmas Gift: Fleece Headband

I love a DIY gift. Even though the person who receives it will likely not understand how much time and effort went into choosing the supplies and putting it together. Or they may not use it at all, leaving you wondering what other productive tasks you could have been doing during naptime. Did that sound negative? Mostly joking on that, but in truth I have narrowed my homemade gift recipients to DIYers and lovers of the homemade crap only. Everyone else gets gifts from the grand old Internet. Now on to the real reason for posting: a DIY gift you could give to almost anyone.

Here is a little homemade gift that I put together in about thirty minutes--a fleece earwarmer/headband. I found the inspiration and basic directions at Delia Creates. I did have to adjust the size and instead of one layer of fleece used two, as winter can be a little brutal around here. I like the way it turned out, especially the bow on top. Can't wait to send this off and whip up a few more.

And a picture to brighten your day. We should all smile like this. It makes for a fantastic shot. Am I right?

Wednesday, December 14, 2011

Sew Easy Sleep Sack

If I can make this, anyone can. It's a cinch, or at least once I got the zipper in it was--my first zipper experience, and it went well. I used a pattern (sort of) that my mom had on hand, but there is a link I've got pinned on Pinterest (error 503, unavailable, will upload that later) that has easy step-by-step directions to make your own easy pattern.

This was a free project for me, as we had the zipper and flannel on hand. Now that I have one under my belt, this might be a great gift to whip up for expectant mommies.

Monday, September 19, 2011

Felt Owl Friend


My niece turned four last week, so to celebrate I crafted up this sweet owl. This little creature is about 10 inches tall and crafted completely out of felt. To make, I cut pattern pieces out of paper then traced onto felt. I attached the felt with a blanket stitch using embroidery floss in matching colors. It's stuffed with the regular ole' filling from the craft store and lots of love. This might be just the beginning of my animal adventures with felt.

Thursday, August 11, 2011

More Polka Dots: A Quilt

Time for a tour of our little guy's room. I'll show you a few of his decos for the next few posts and hopefully give you some inspiration.

Could not tell you what pattern we used for this delightful little quilt. If I find it, I will let you know. It was a little smaller than crib size, so we added a row of squares. The circles were cut with a special circle cutting tool my mom found at a craft store. We heat n' bonded them together and then zig-zag stitched over the top to reinforce.


In this post, I shall refer to "we" when discussing the construction. This we is my crafty mom, my talented aunt, and me. I did plenty of cutting and ironing and some sewing.


I like the neutral colors--perfect for a boy or girl. Of course I love the polka dots.


Tuesday, July 26, 2011

Sunglass Case Tutorial


This is a fun little project, and took me only half an hour. It involves sewing only straight lines...perfect! Here's a quick tutorial to make a sunglasses case of your own.

Materials:
-2 strips of fabric, 19" x 4.5"
-small piece of velcro
-sewing machine with thread, scissors

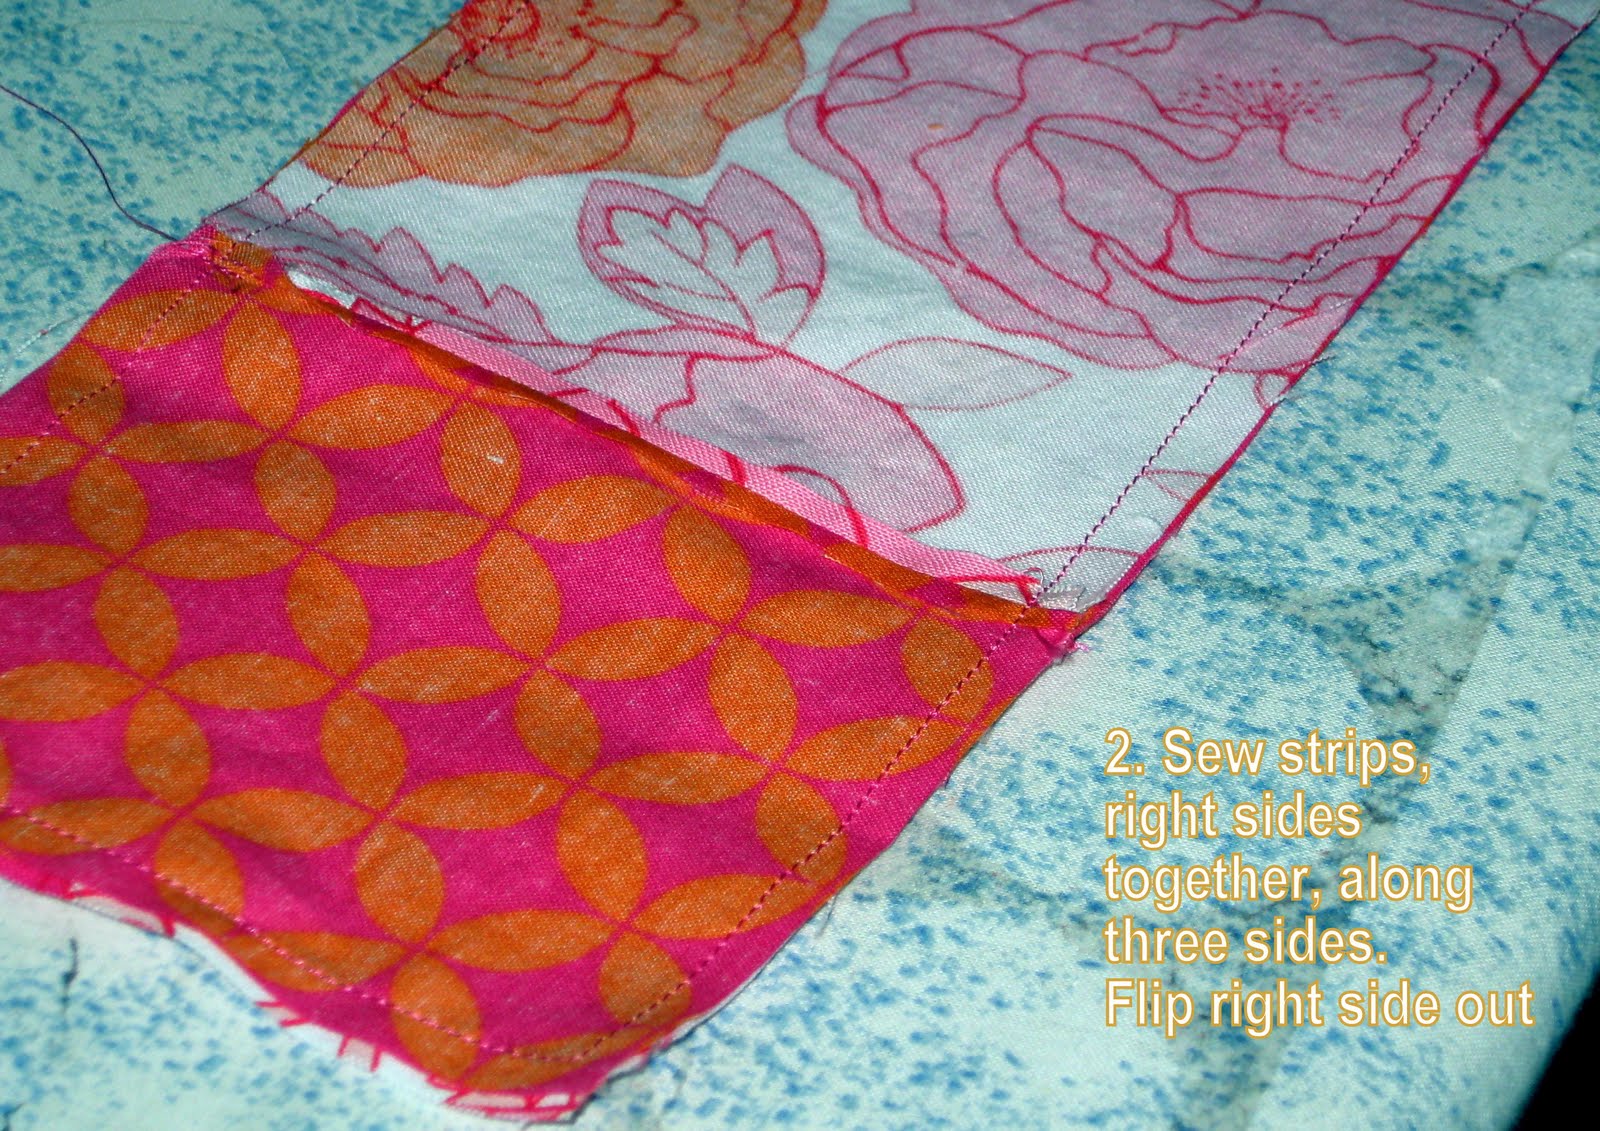
1. Cut two strips of fabric, 4.5" by 19" (more or less depending on size of your shades). In the picture you'll see I cut off the top portion of the material and sewed it on the other strip for a contrasting flap.

2. Sew the strips right side together on three sides. Flip right side out and iron flat.

3. (No pictures...sorry) Fold the main part of the case up and sew on the outside edge of the case, creating a pocket to keep your sunglasses in. For the fourth side that didn't get sewn in step two, I folded the material under and sewed the seam on the outward side.

4. Sew a velcro tab onto the flap and main case to keep it closed. You're done!

Sunday, June 26, 2011

Sew Your Own Bibs

We have more than twenty bibs, and with the amount of drool going on around here, we still don't ever seem to have a clean one. So, instead of doing my required coursework or tending to my house duties during nap time, I whipped up a few little robot bibs. I am glad I did. How cute are they?

This is a simple project for people like me who aren't so comfortable at the sewing machine, but want to give it a go anyway. If you're a master stitcher, this is gonna be child's play for you...maybe skip to the picture of the cute kid. For the rest of us, here's a short tutorial on how to make a bib.


My mom found this fabric at Hobby Lobby. There are more than 6 different robot guys on the fabric to choose from. To finish the bib, I machine stitched around the edge of the entire bib. This gives it a more polished look and rids the need for hand stitching the hole closed. For the closure, I am going to try a snap, but didn't have any of those on hand. We like velcro too and if the snaps don't work out we'll do that.

All my best,
Robin

Thursday, June 23, 2011

Flower Power to the Rocker

Technically, it's "Good Food Friday." Technically, I've been a terrible blogger. So, rather than share a recipe with you (I have one, just made it this week, and it's awesome), I thought I'd do my best to impress you with a righteous rocker redo I've been working on. Technically not a redo, but a little makeover, if you will.

It started out as shown in the picture above. The rich brown shade is one of my favorites, but after living with it for a while, I started to realize how many neutrals, especially brown, I had going on around this chair. Here's a visual:
Like the random objects placed haphazardly on the piano? It's called "anything breakable gets set on the nearest high object." Too much brown, though. You agree?

I found this decorator fabric at Hobby Lobby and fell in love. I knew it would spruce up the glider. It's been in my drawer for months-- the pattern and colors....yum! To make it, I didn't do anything technical. I basically laid the cushions down and pinned the fabric to fit snugly around them. After machine sewing around three sides, I hand stitched one side and could adjust the fit that way too. I am pleased with the visual interest it adds to the space, and this motivates me to get more house projects done!

All my best,
Robin

Thursday, June 9, 2011

Lamp Love: A Redo

Friday seems as good a day as any to share with you my latest and greatest project. This replaces Good Food Friday today, as there hasn't been much good food around these parts. I've taken a brief sabbatical from cooking and have focused my attention in a hundred other places. One of them, decking out our little home. This lamp redo was inspired by one over at Crafting in the Rain. Hers was so cute I had to do one for our living room. Here is how it went down:
1. I purchased this lamp at a garage sale for $1. Not hideous, but not fabulous either.

2. I purchased a yard of white polka dot fabric. My inspiration shade was white, so I thought it was a good idea. It wasn't. Halfway through, I realized it was looking like it belonged in a young girl's bedroom. But I have pictures of the next step in white anyway: cut into four inch strips. Fold the strip in half and iron it on the fold.


3. Every few inches, fold the fabric over to form a pleat and pin into place. Once you have the length of your fabric pinned, sew across the top (near raw edge) of fabric, making the bottom of the pleat a finished, folded edge. You may need to put two strips together if your shade is large. Iron the pleats down.

4. Hot glue the pleated strips on to the lamp shade, joining at the back and overlapping slightly. I used 2 prints...One I had on hand, the other I found on clearance to replace the white. While this was happening, my husband was graciously spray painting the base for me with paint left over from our silverware hanging.


5. I finished the top by gluing on some white bias tape I had on hand and then adding a little rick rack. It turned out a little whimsical/vintage and fits in with our eclectic decor.

I finished the project in about two hours and for less than five bucks.

All my best,
Robin

Sunday, May 1, 2011

Ruffle Scarf

We have been bundled up in scarves all winter long here in frigid SD, and now it seems spring has sprung. That's no excuse for us to stop accessorizing, we just modify. Barb is here with a project that has us thinking more flip flops and umbrellas and less snow boots and ice scrapers.


I found this tutorial on Simple Sister Blog and thought, "I must try this." Their tutorial is easy to follow, so we won't try to duplicate the directions. It was a fun project and very easy. To do the project, you need 1/2 yard fabric for an adult size, as well as elastic thread, a sewing machine, and believe it or not, a candle to melt the edges. When purchasing the elastic thread, I shared with the clerks what I was making and they looked at me like I was crazy. Guess what, though? It worked, and was easy! Follow the instructions in the linked site and you can have a new accessory for your Spring wardrobe.
-Barb


I apologize for only sharing a single shot. The scarves were not cooperating for their photo shoot. Either that or the photographer didn't have the skills. This one is nice and long, so can be worn a ton of different ways, but since you're making your own, you can do any length and fabric, as long as it has some polyester-- it's all about options!

All my best,
Robin